Distributing Datasets
We recommend enterprise users establish a base account which contains the base versions of datasets that will be distributed and updated to customer accounts. With this setup, enterprise admins can iterate and ensure that these datasets and their data assets are performing as expected before distributing them.
Typical Workflow
A typical workflow looks like the following sequence diagram.
Suppose we have a dataset Base in a base account that is ready for customer use.
An enterprise admin can use a copy job to push this dataset from the base to the customer account (labeled Customer v1).
The customer can now use this dataset in their account.
Simultaneously, enterprise admins can refine the base dataset (e.g., updating dimensions and metrics or admin feedback).
At some point, the enterprise admins may decide that they want to send these refinements to the customer dataset via an incremental update.
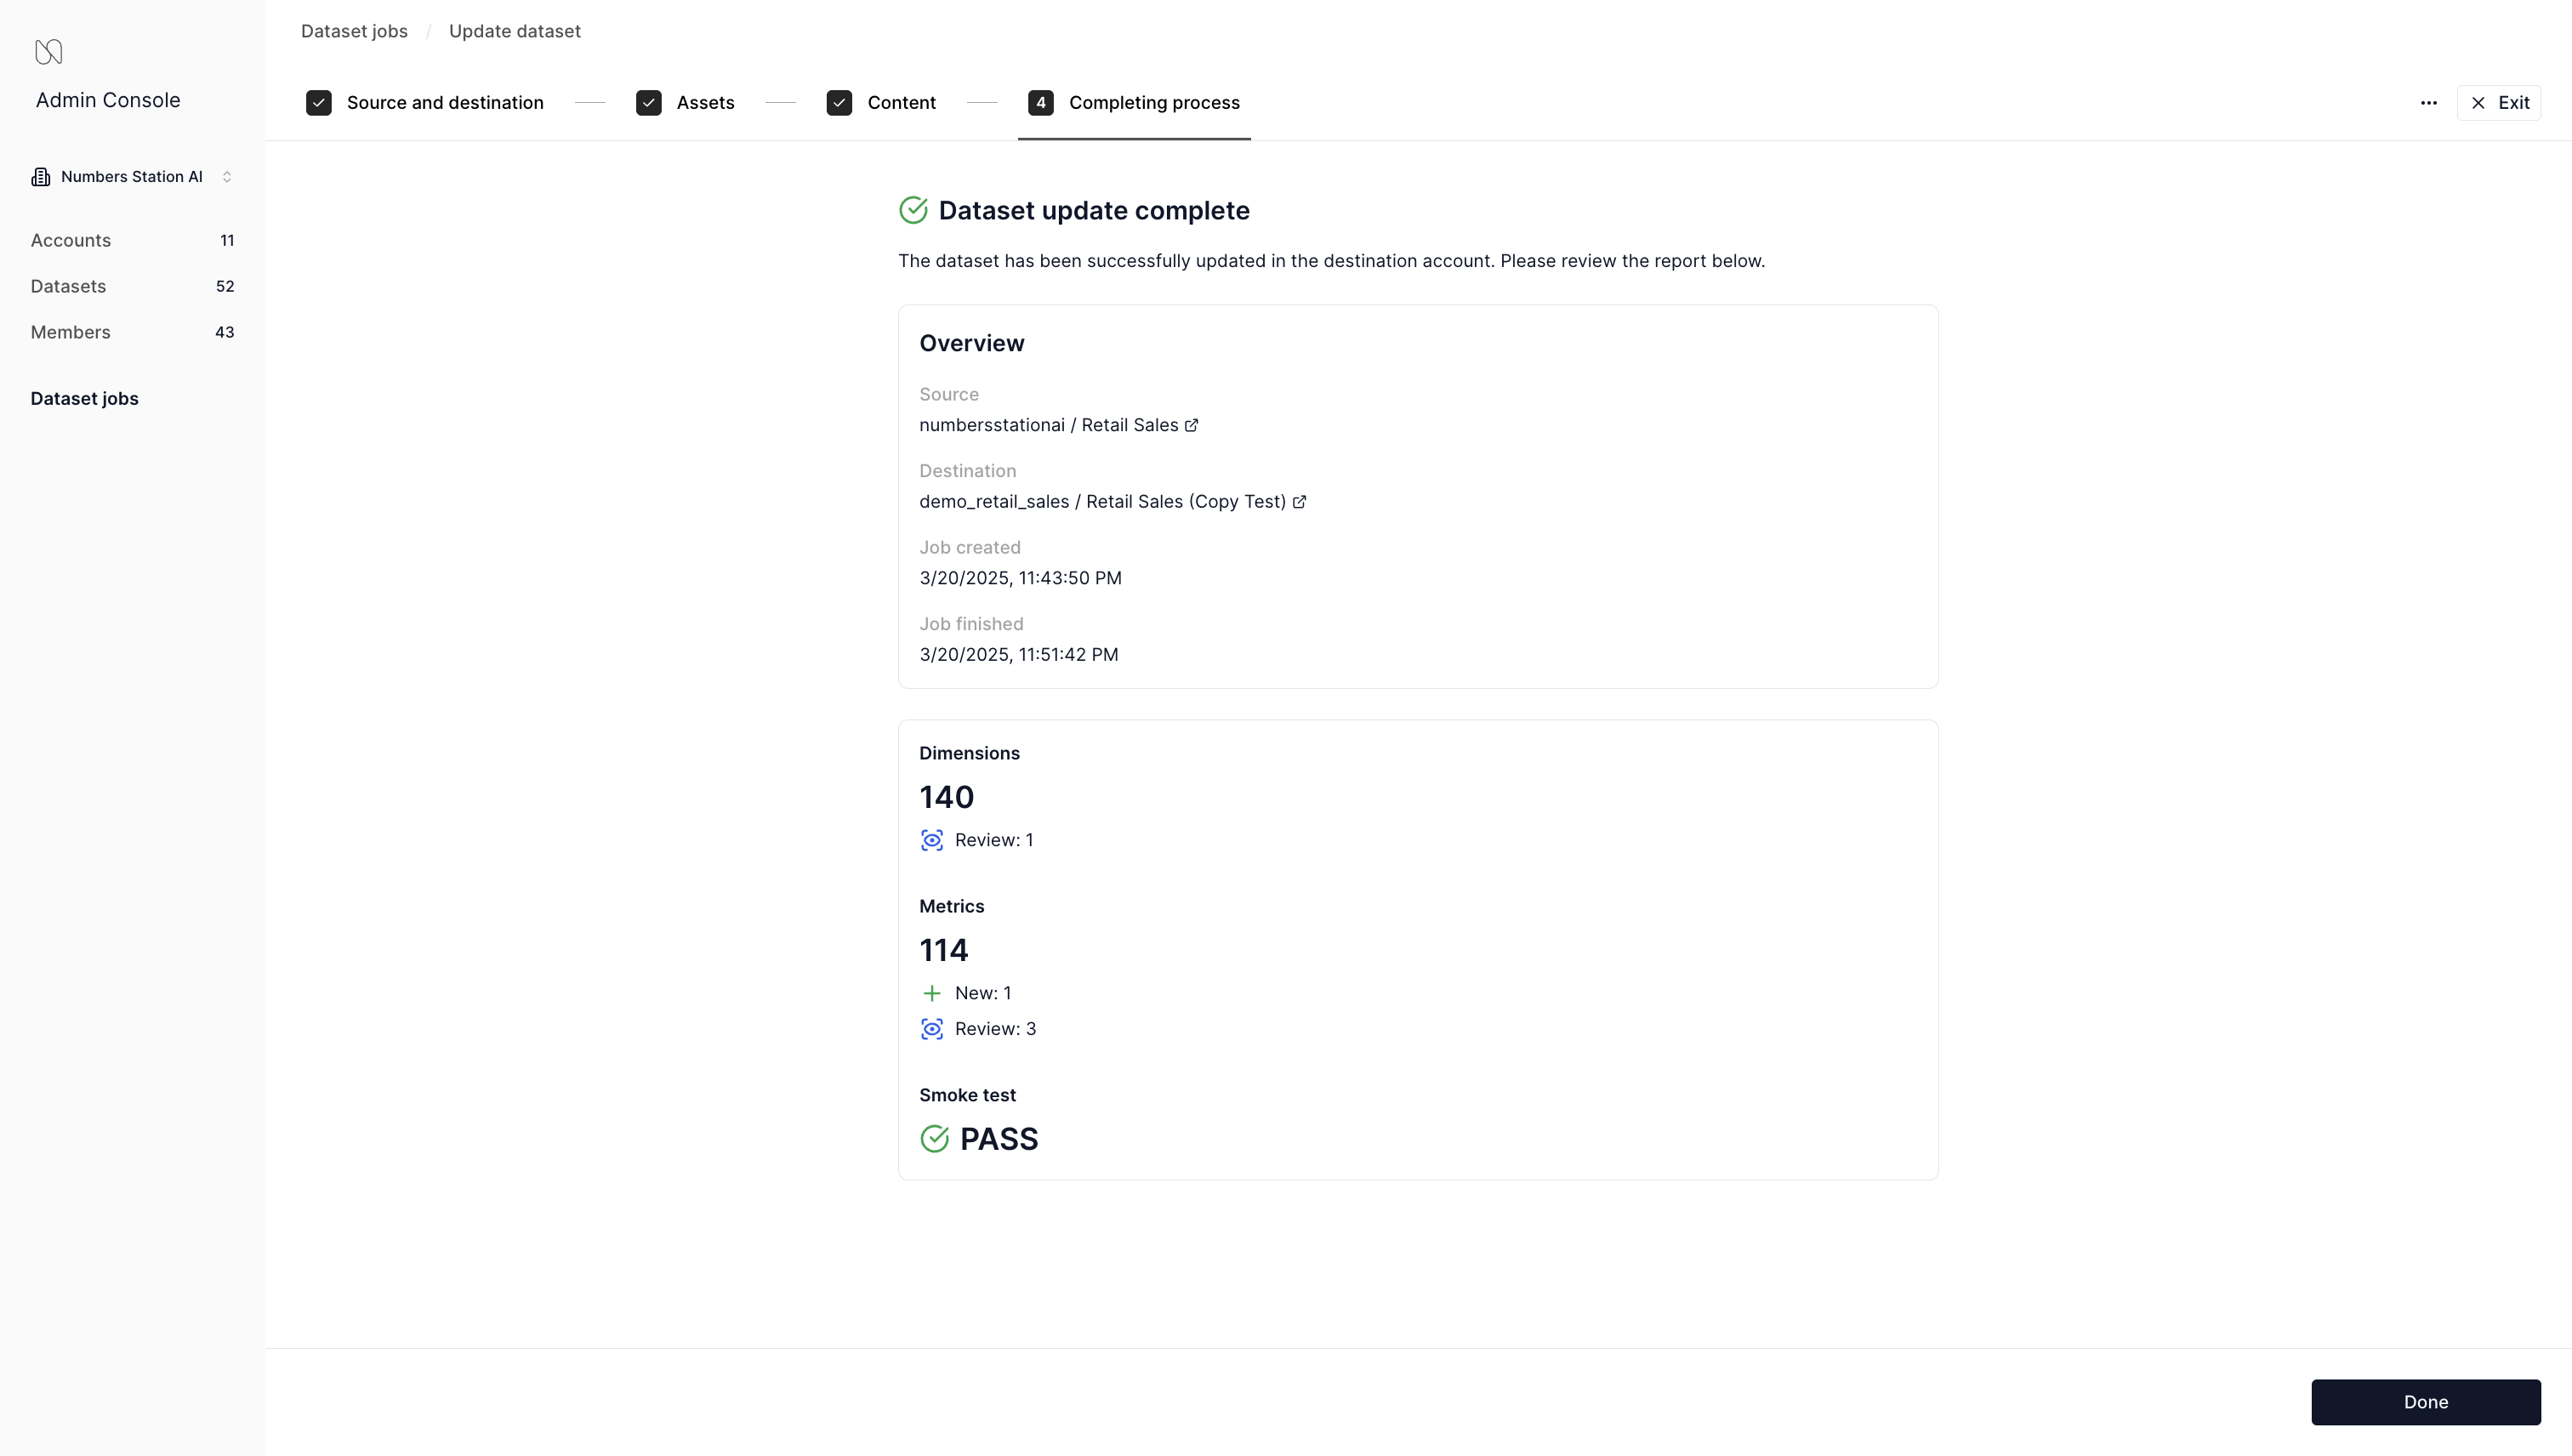
They can do so via an update job.
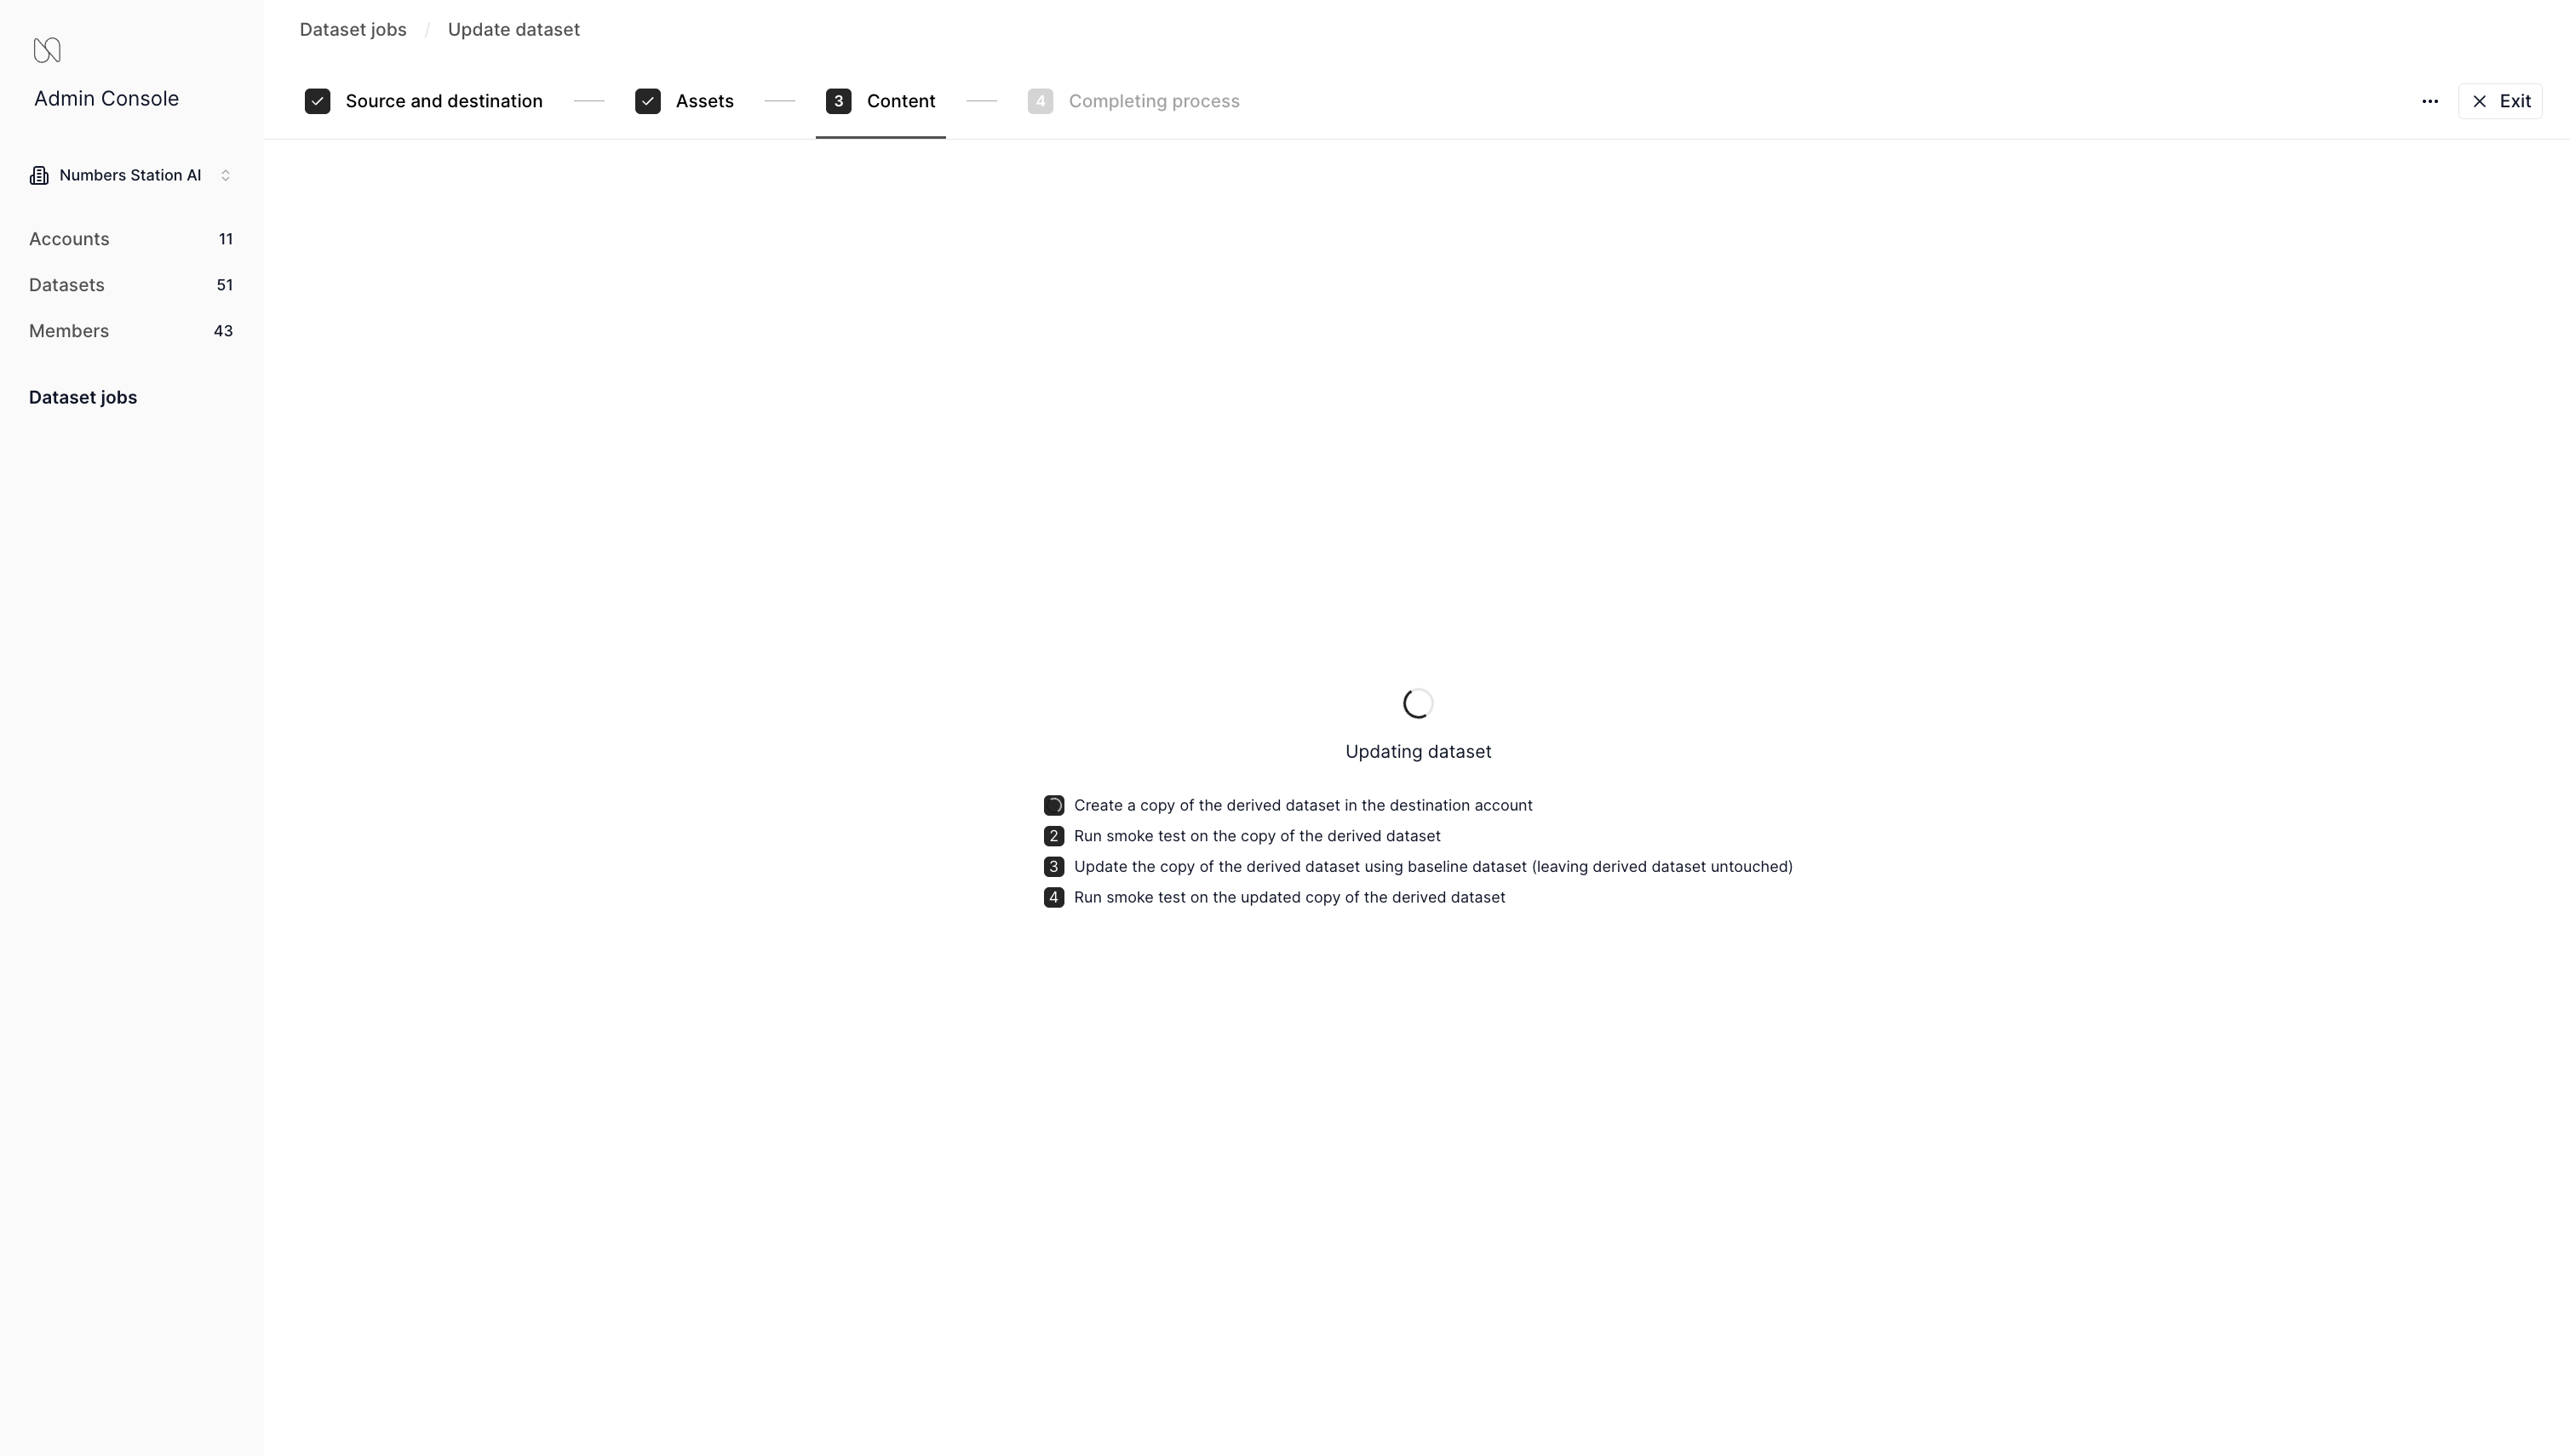
An update job will create a copy of the destination dataset, update that copy from the base, and then archive the destination dataset.
This is done to provide a clear line to the customer that the new dataset, Customer v2 should now be used.
These incremental updates can continue as needed.
sequenceDiagram
  autonumber
  box Base Account
  participant Base
  end
  box Customer Account
  participant Customer v1
  participant Customer v2
  participant Customer v3
  end
  Base->>Customer v1: copy
  Customer v1-->>Customer v1: Customer Usage
  Base-->>Base: Refinement
  opt Incremental Update
    Customer v1->>Customer v2: copy
    Base->>Customer v2: update
    note over Customer v1: Archived
  end
  Customer v2-->>Customer v2: Customer Usage
  Base-->>Base: Refinement
  opt Incremental Update
    Customer v2->>Customer v3: copy
    Base->>Customer v3: update
    note over Customer v2: Archived
  end
  Customer v3-->>Customer v3: Customer Usage
  Base-->>Base: Refinement
Copying a Dataset
Copying a dataset is how a base dataset from the base account is initially distributed to a customer's account.
- Navigate to the Enterprise Admin Console and then "Dataset jobs" within the console.
- Click on Copy Dataset.
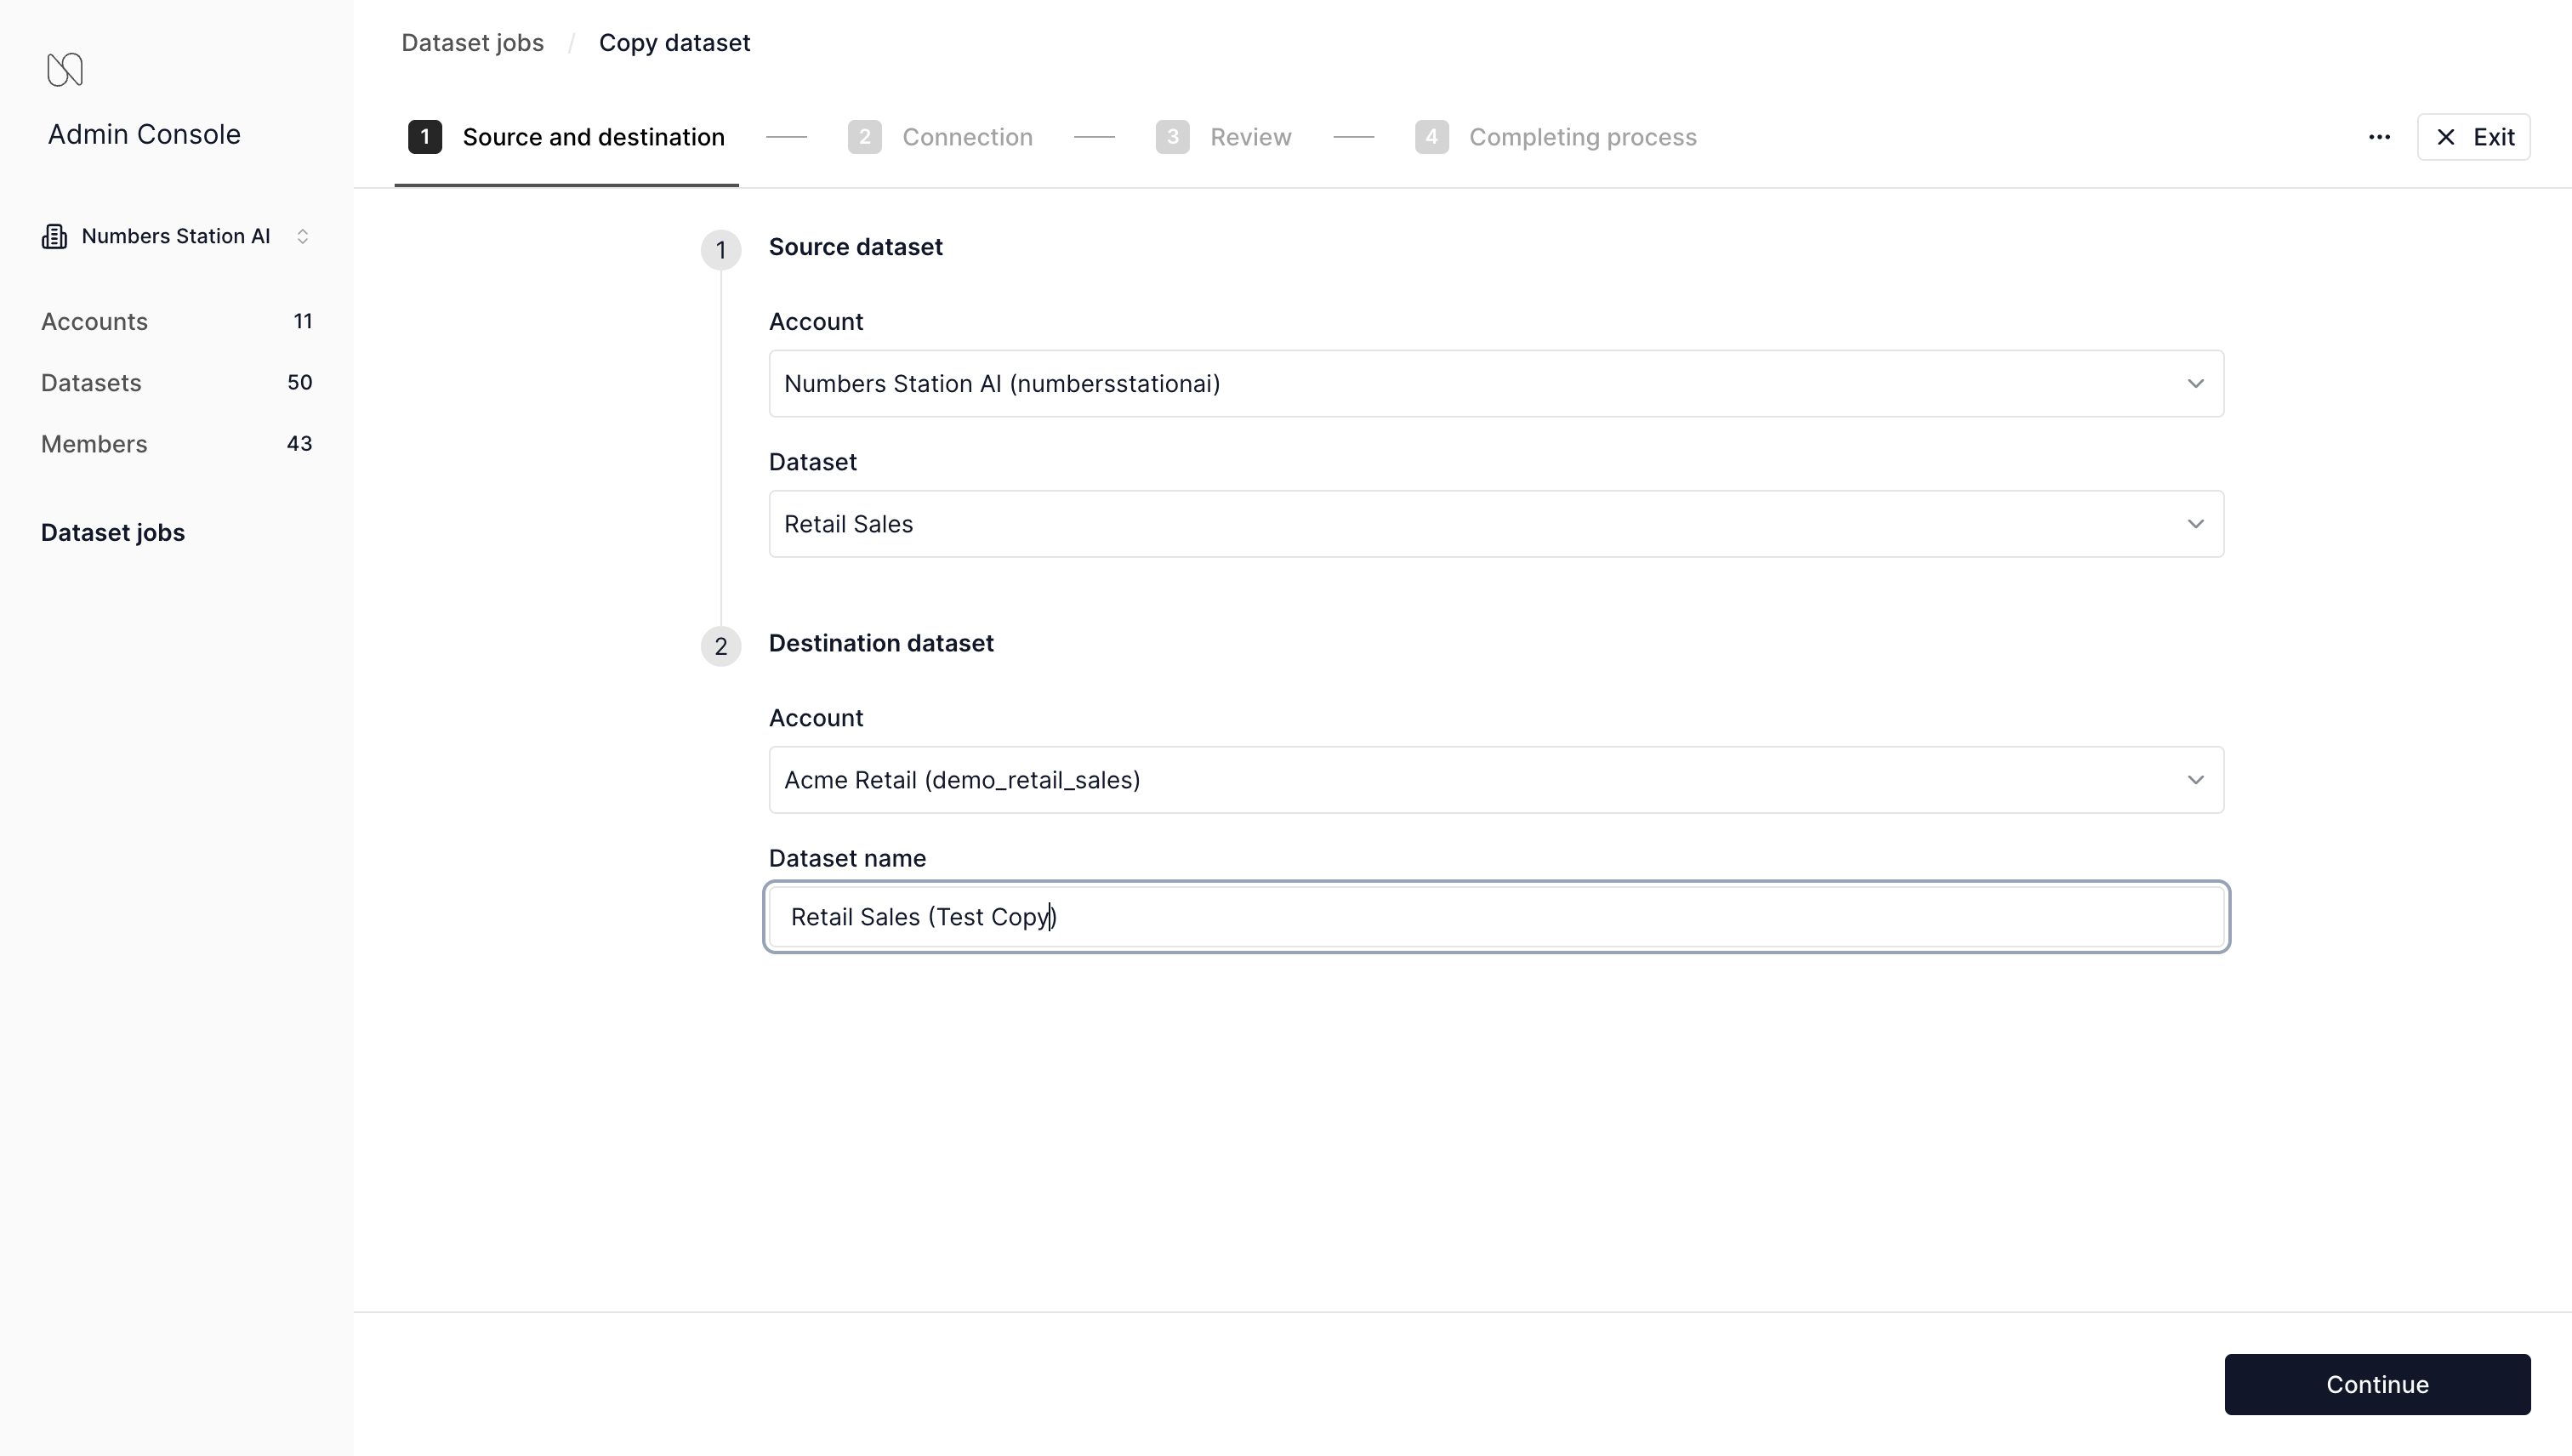
- Select the source account, source dataset, destination account, and then provide a name for the destination dataset.
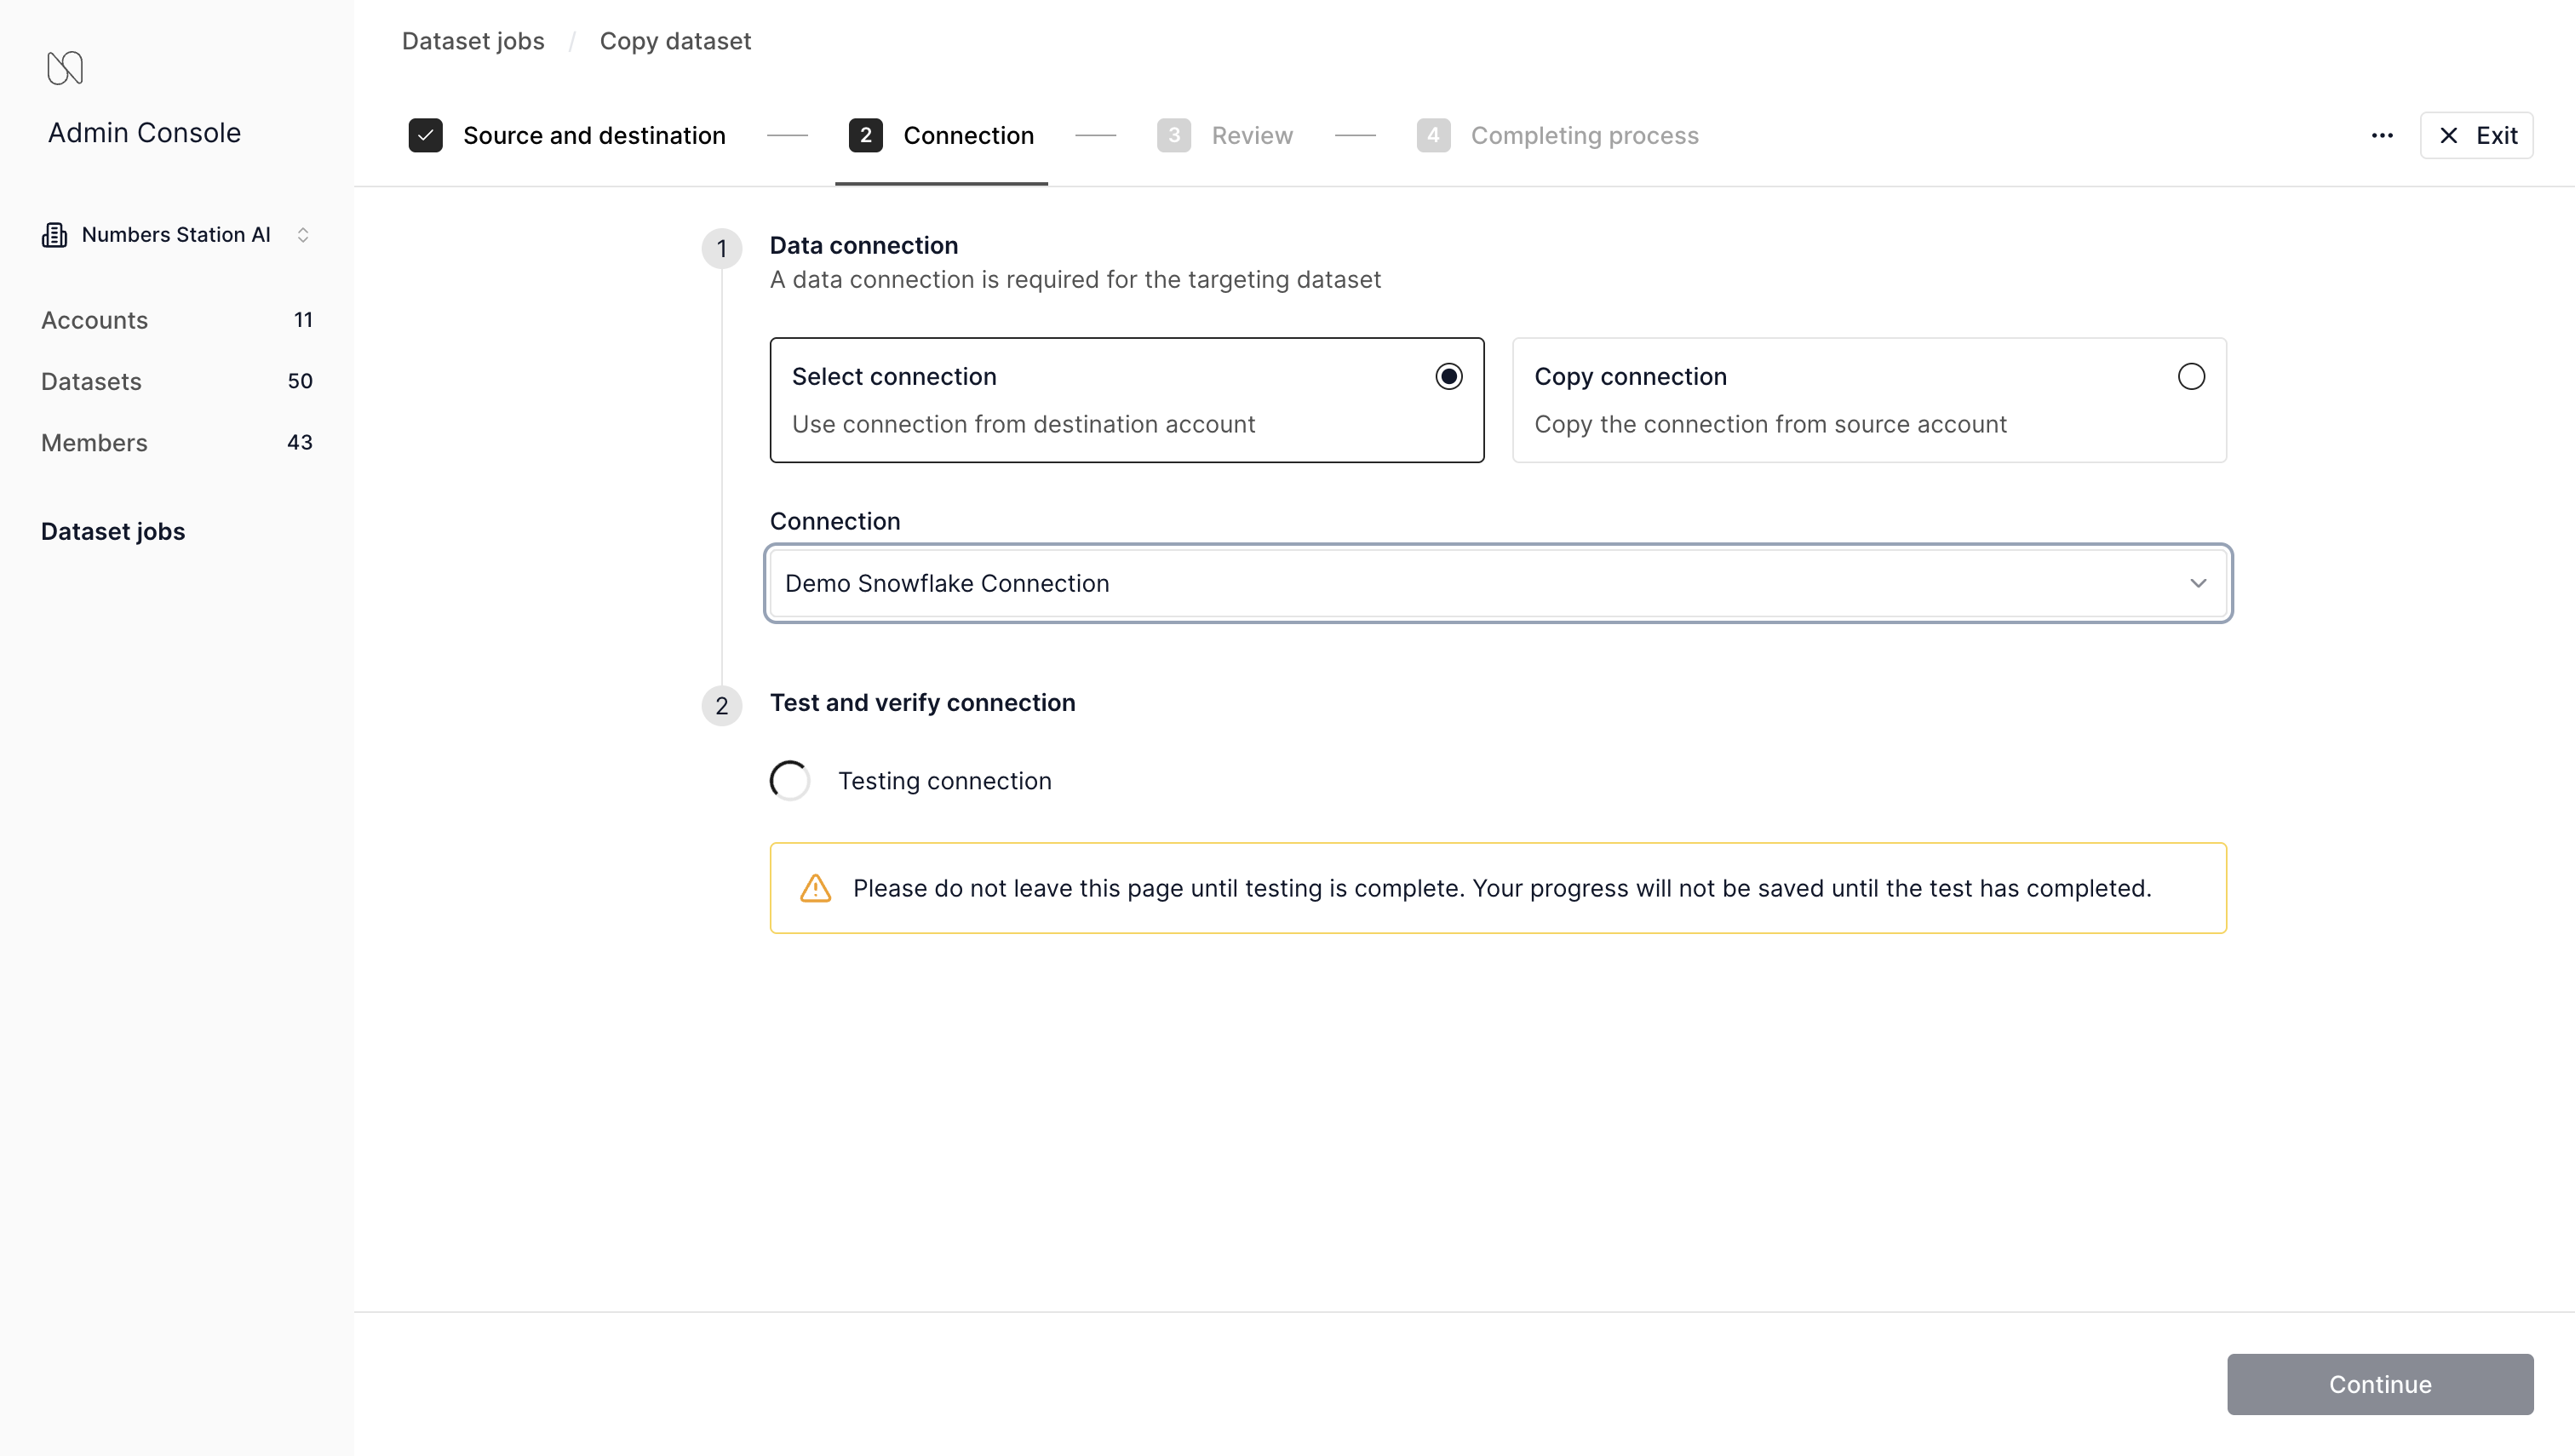
- Pick the Connection in the destination account where the required tables for the dataset exist.
Alternatively, you can copy the source connection.
- The system validates the connection and attempts to automatically map the data sources (i.e., the tables and views) from the selected connection.
If it cannot map correctly, it will show as "missing" and an enterprise admin must edit and pick/define the correct data source for the destination connection.
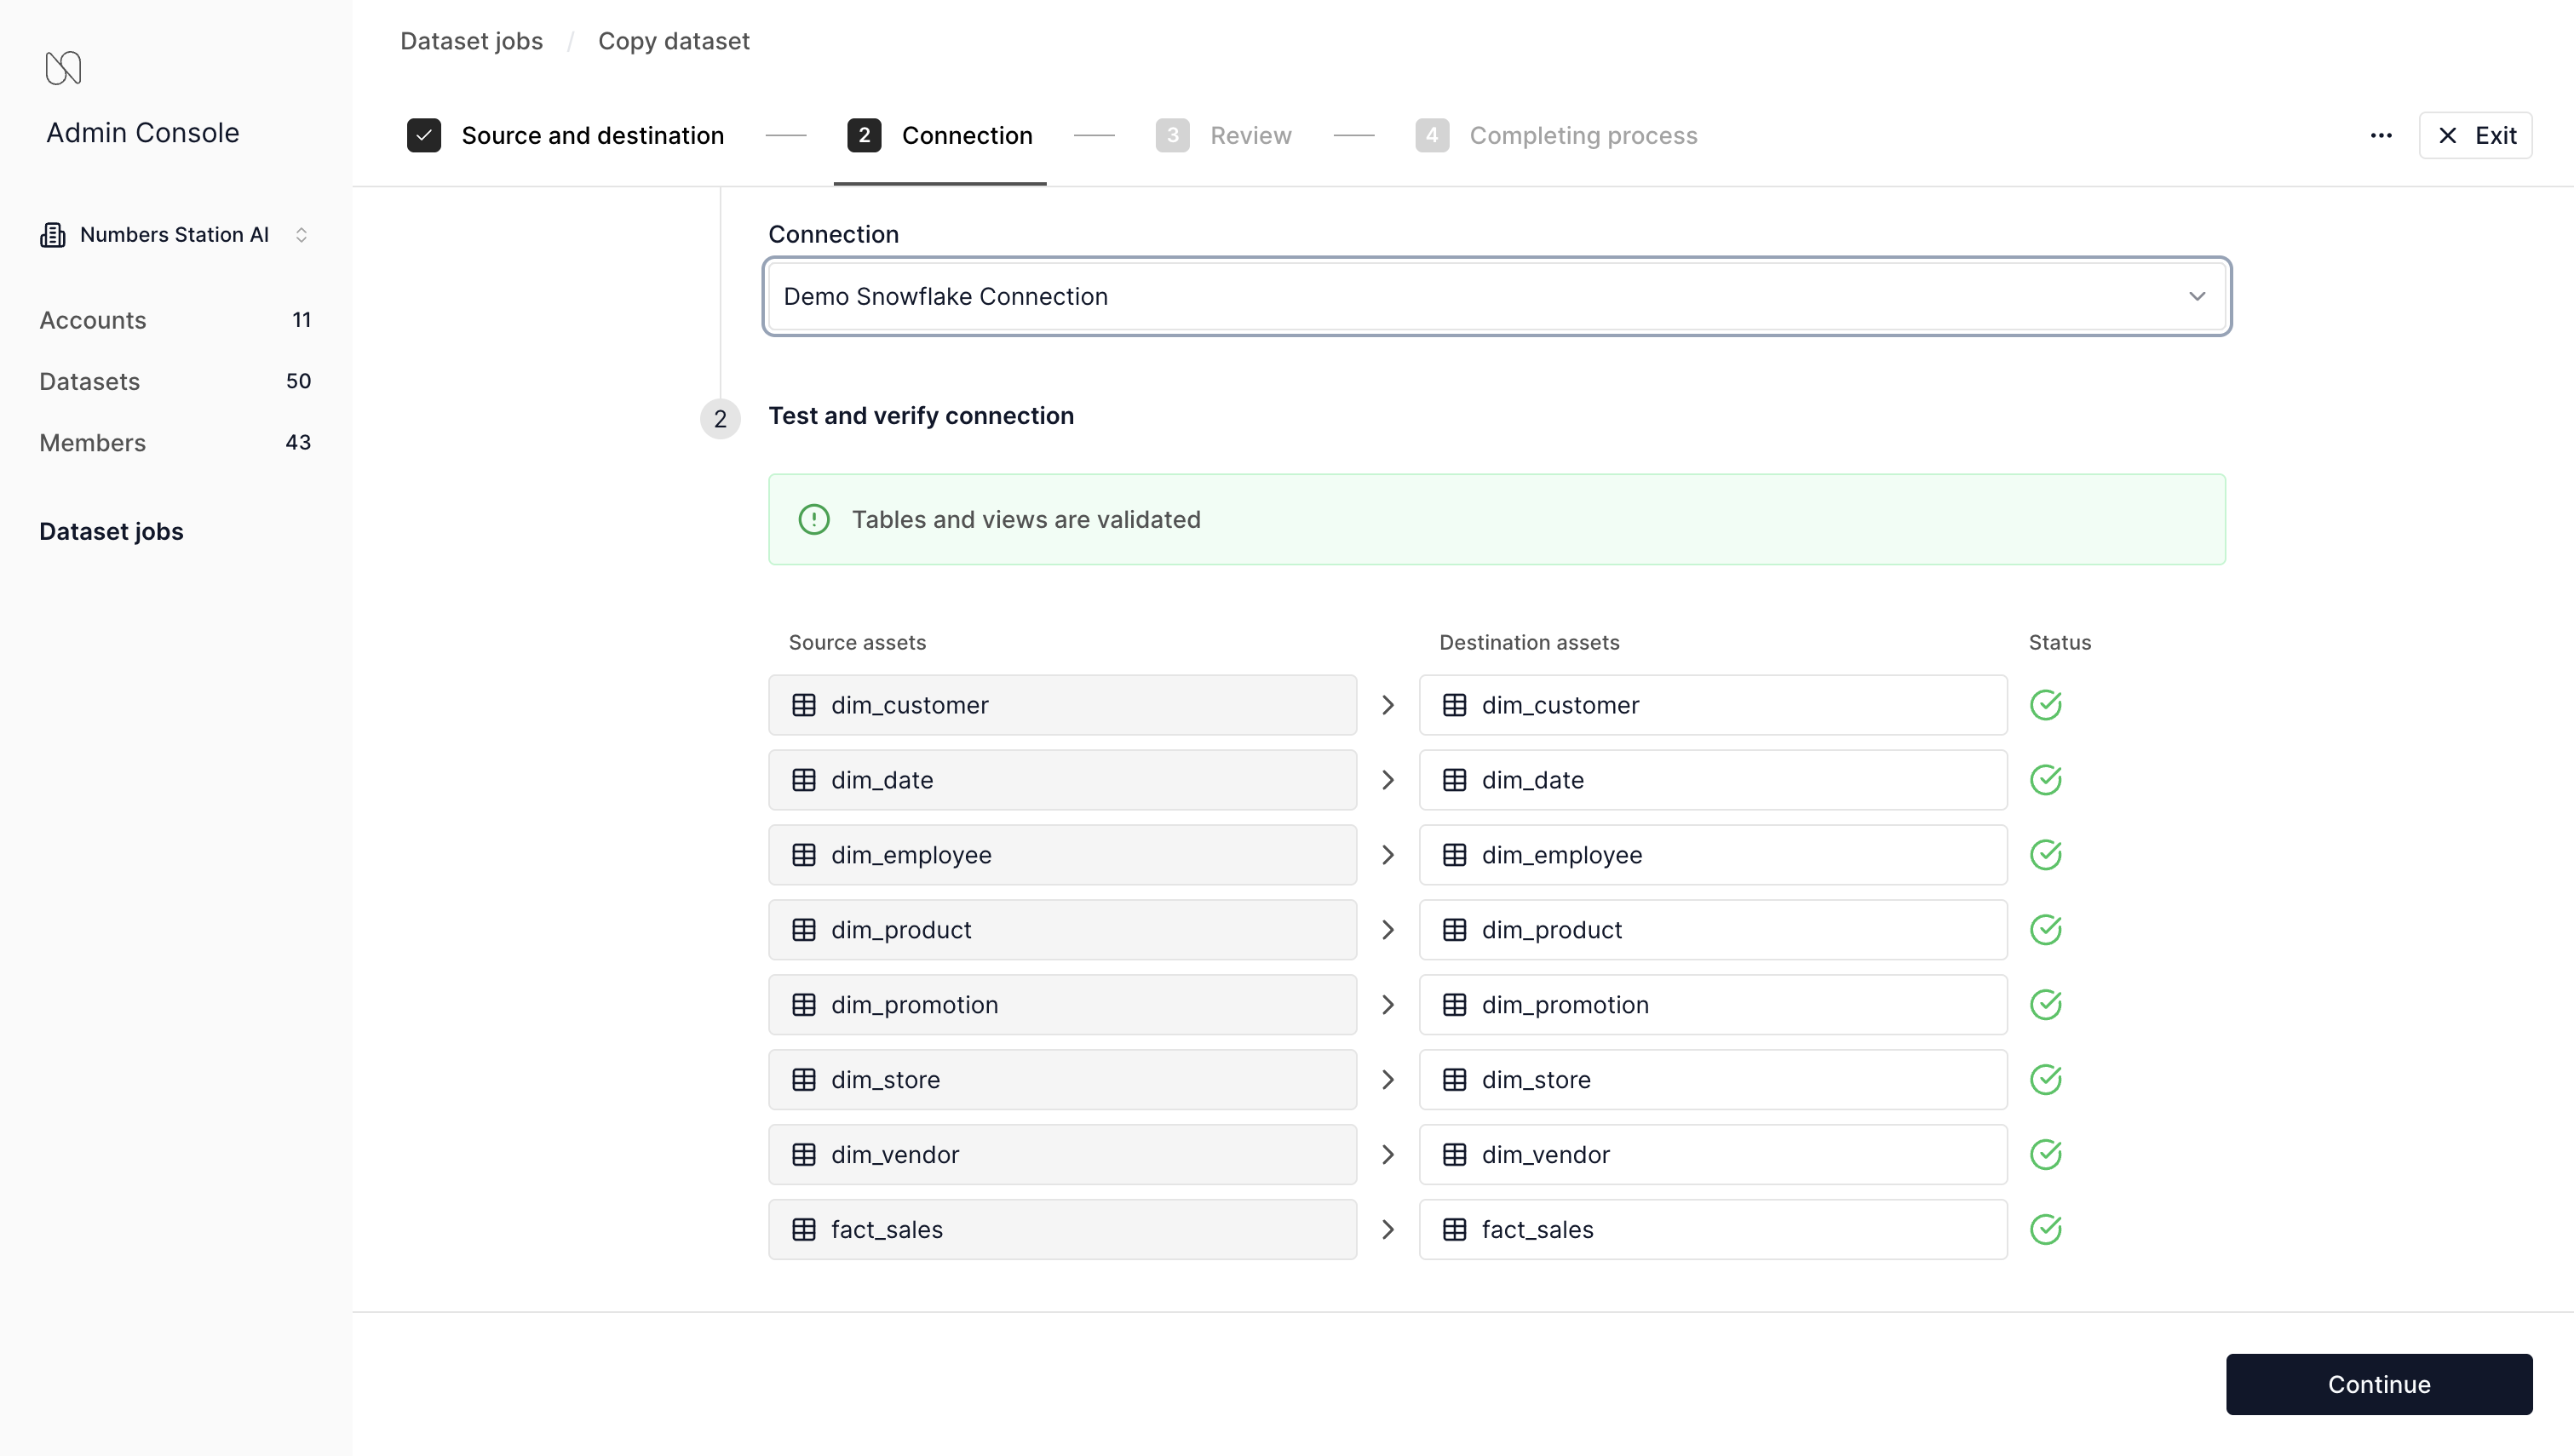
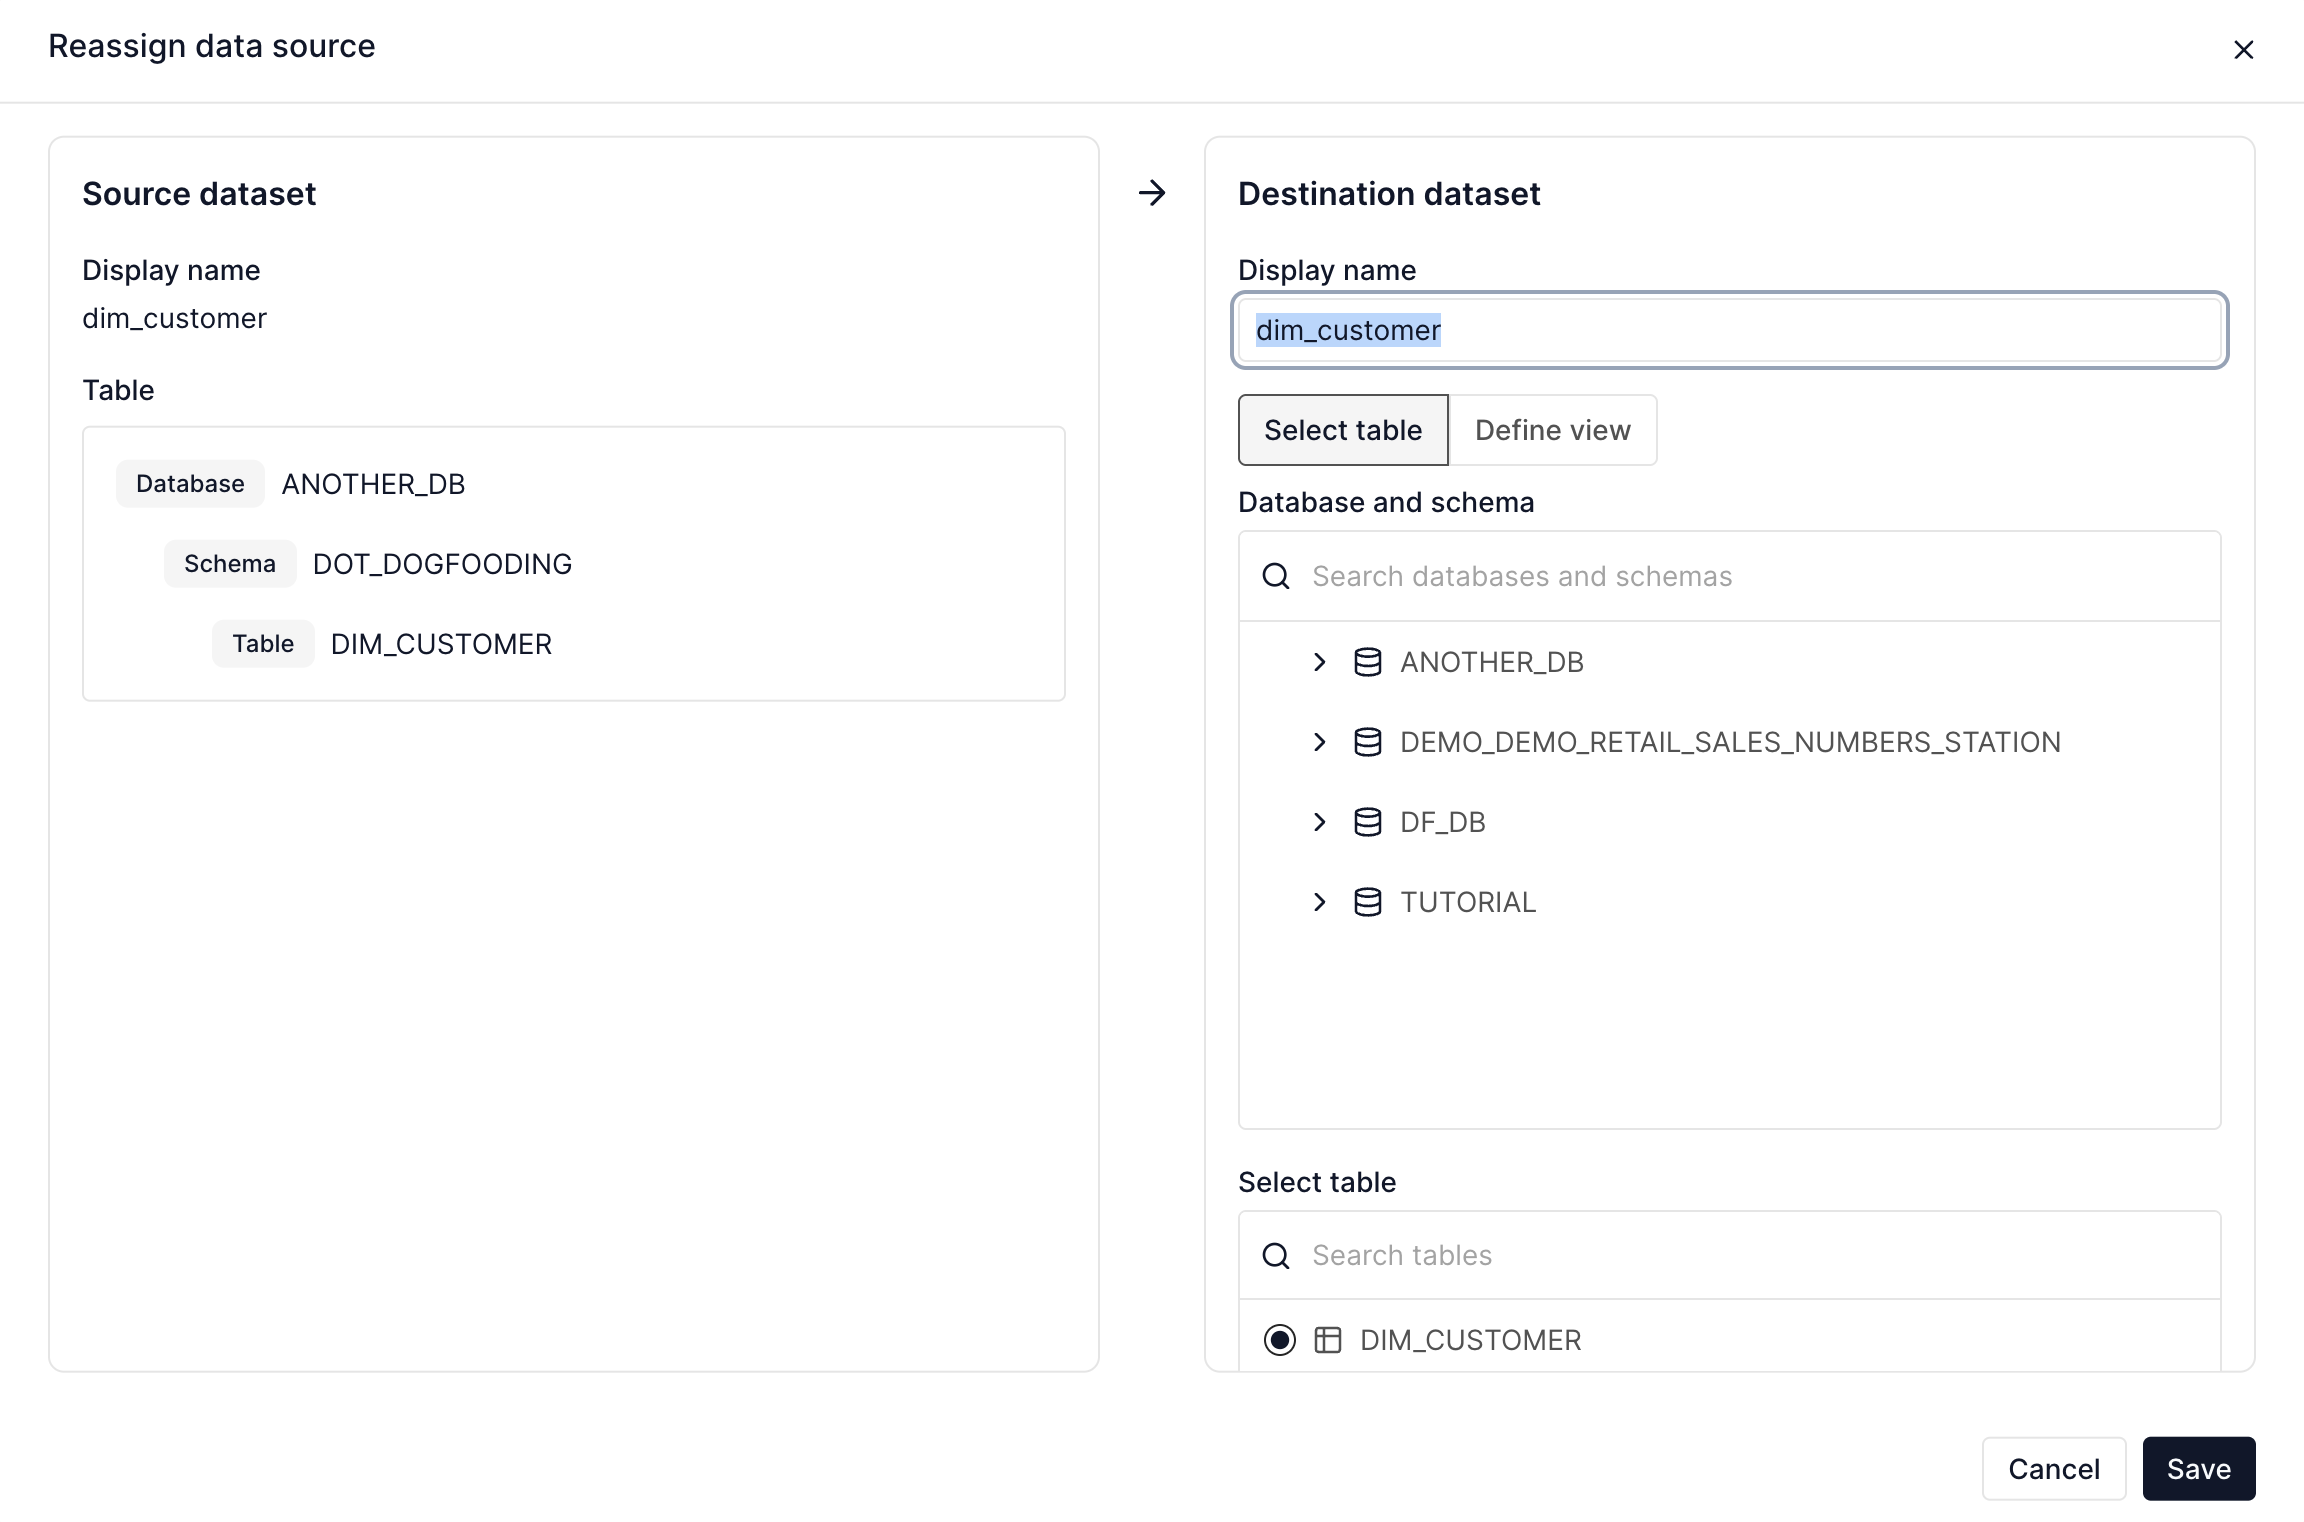
- Once data sources are correctly assigned, click "Continue".
- Once the copy job has made the copy (which takes some time), you can review sensitive expressions.
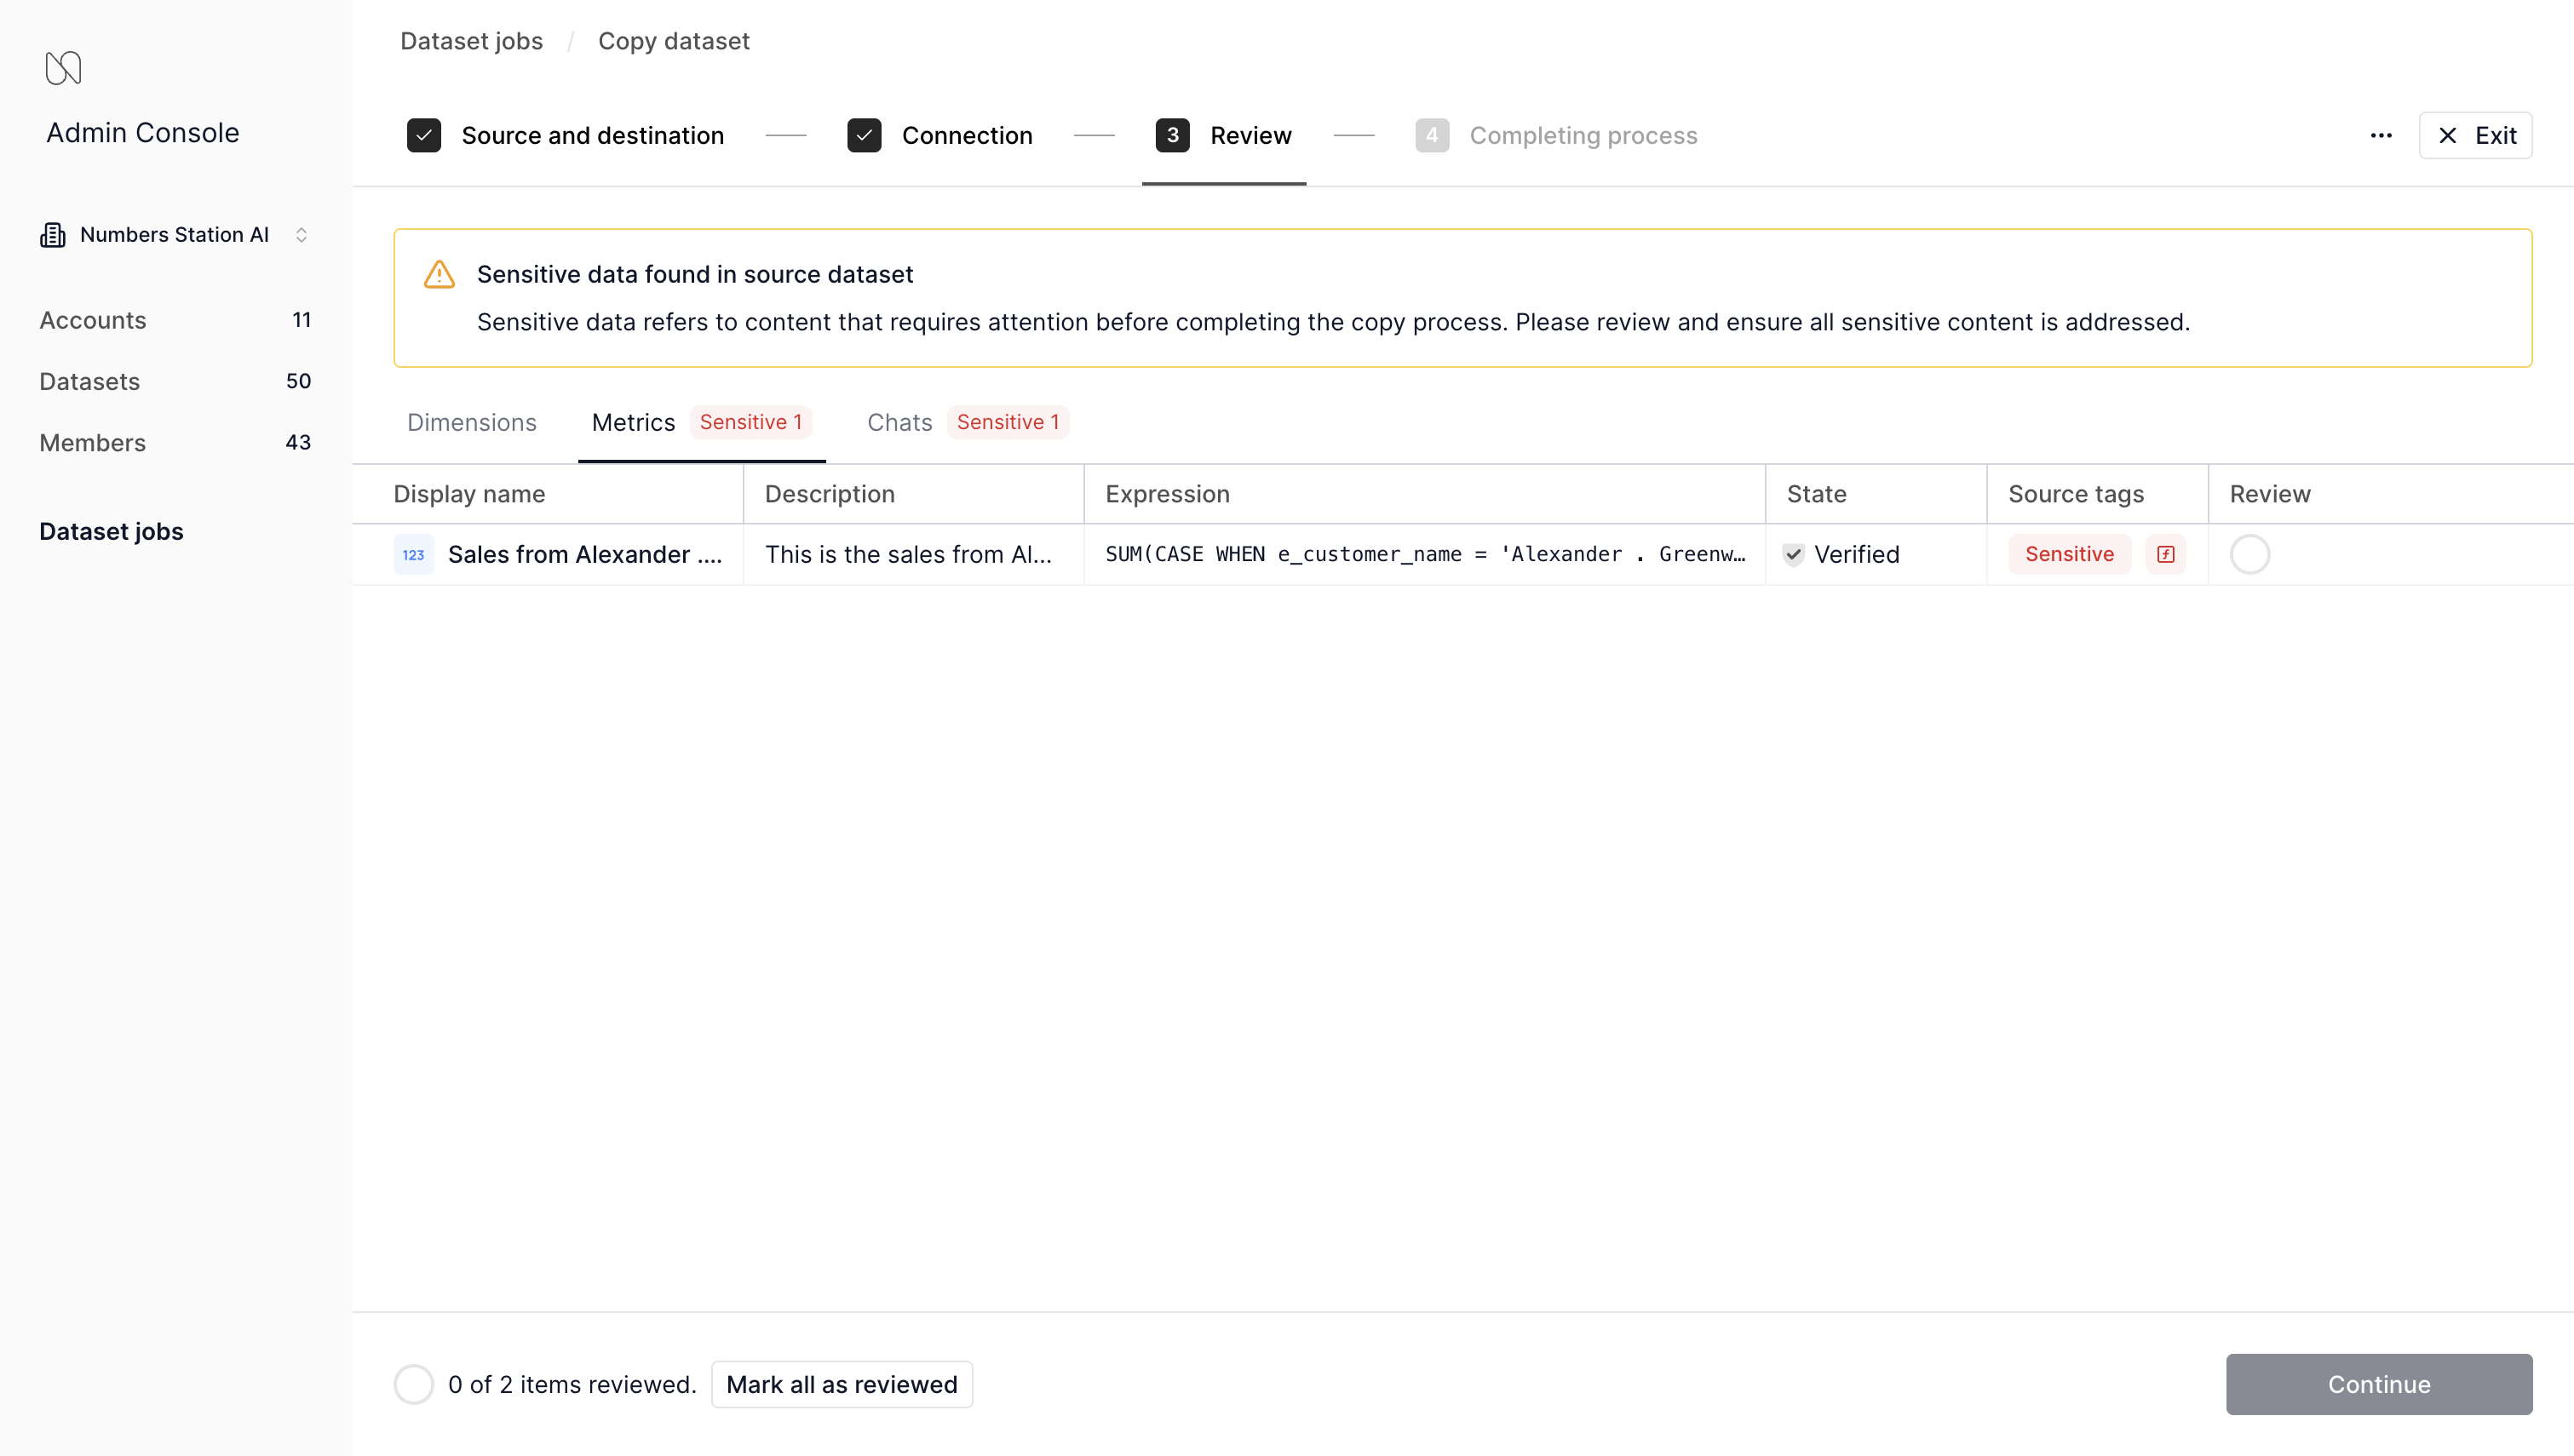
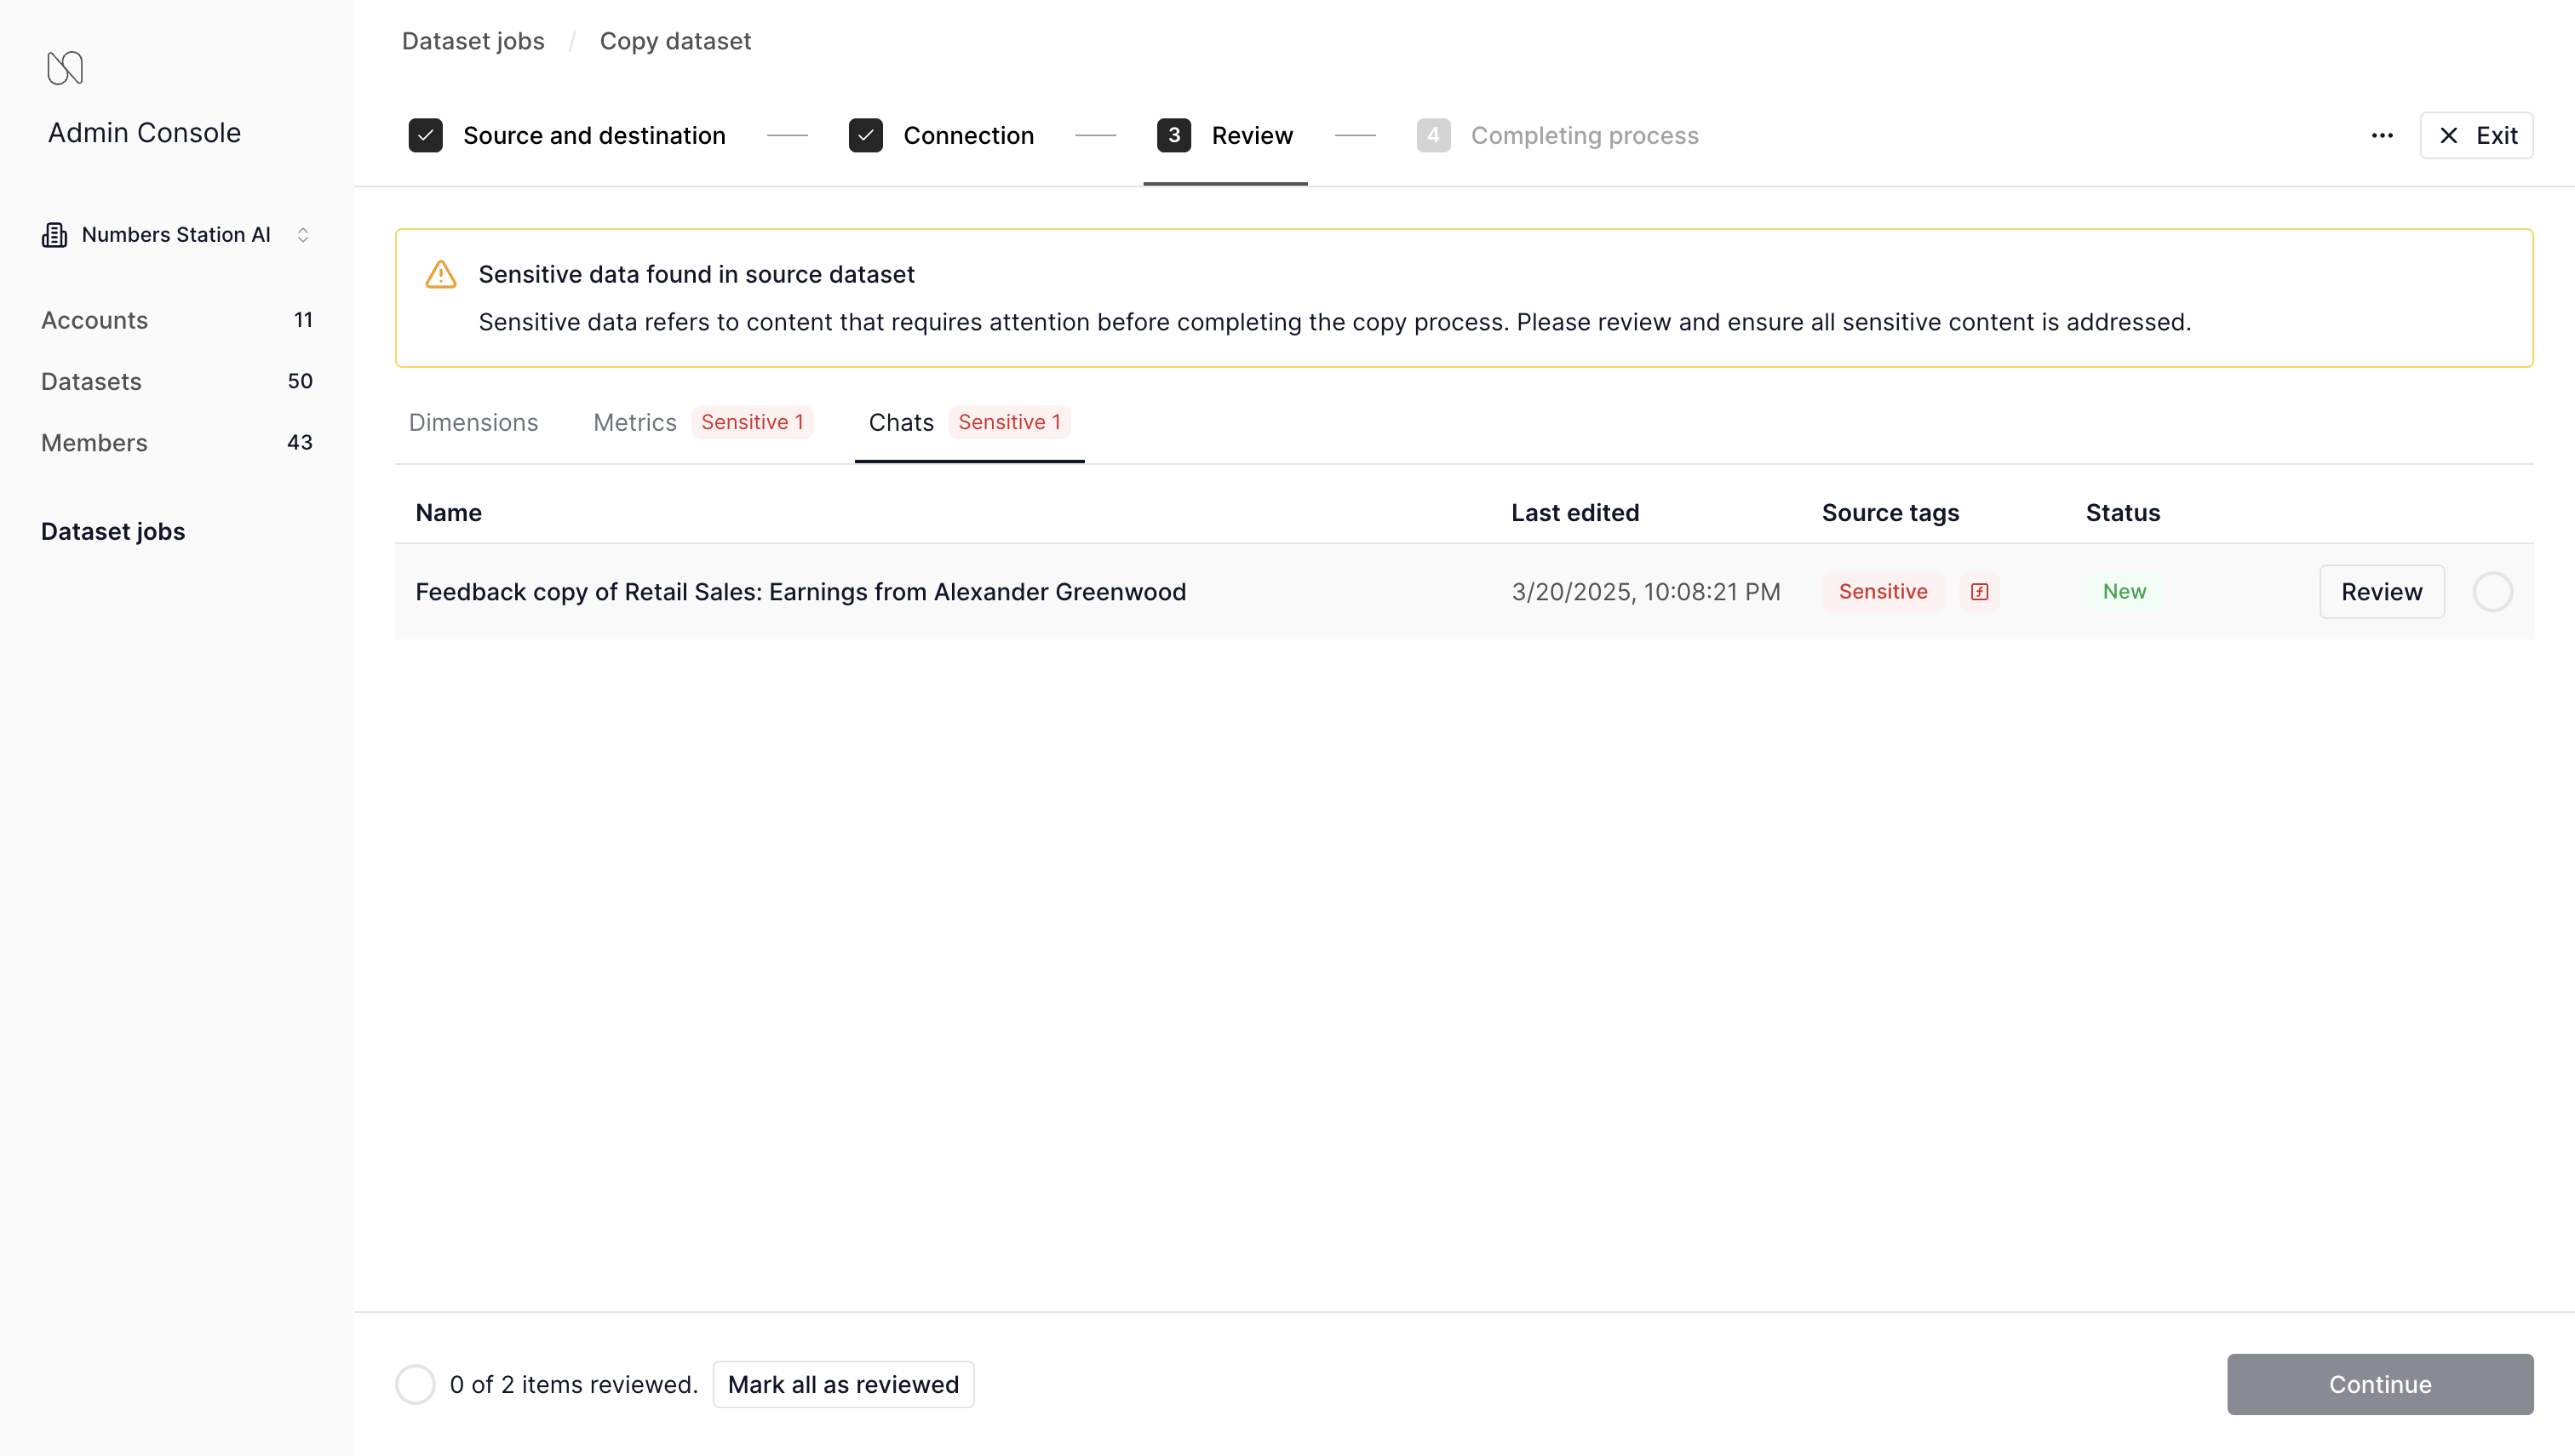
- Edit sensitive expressions as needed.
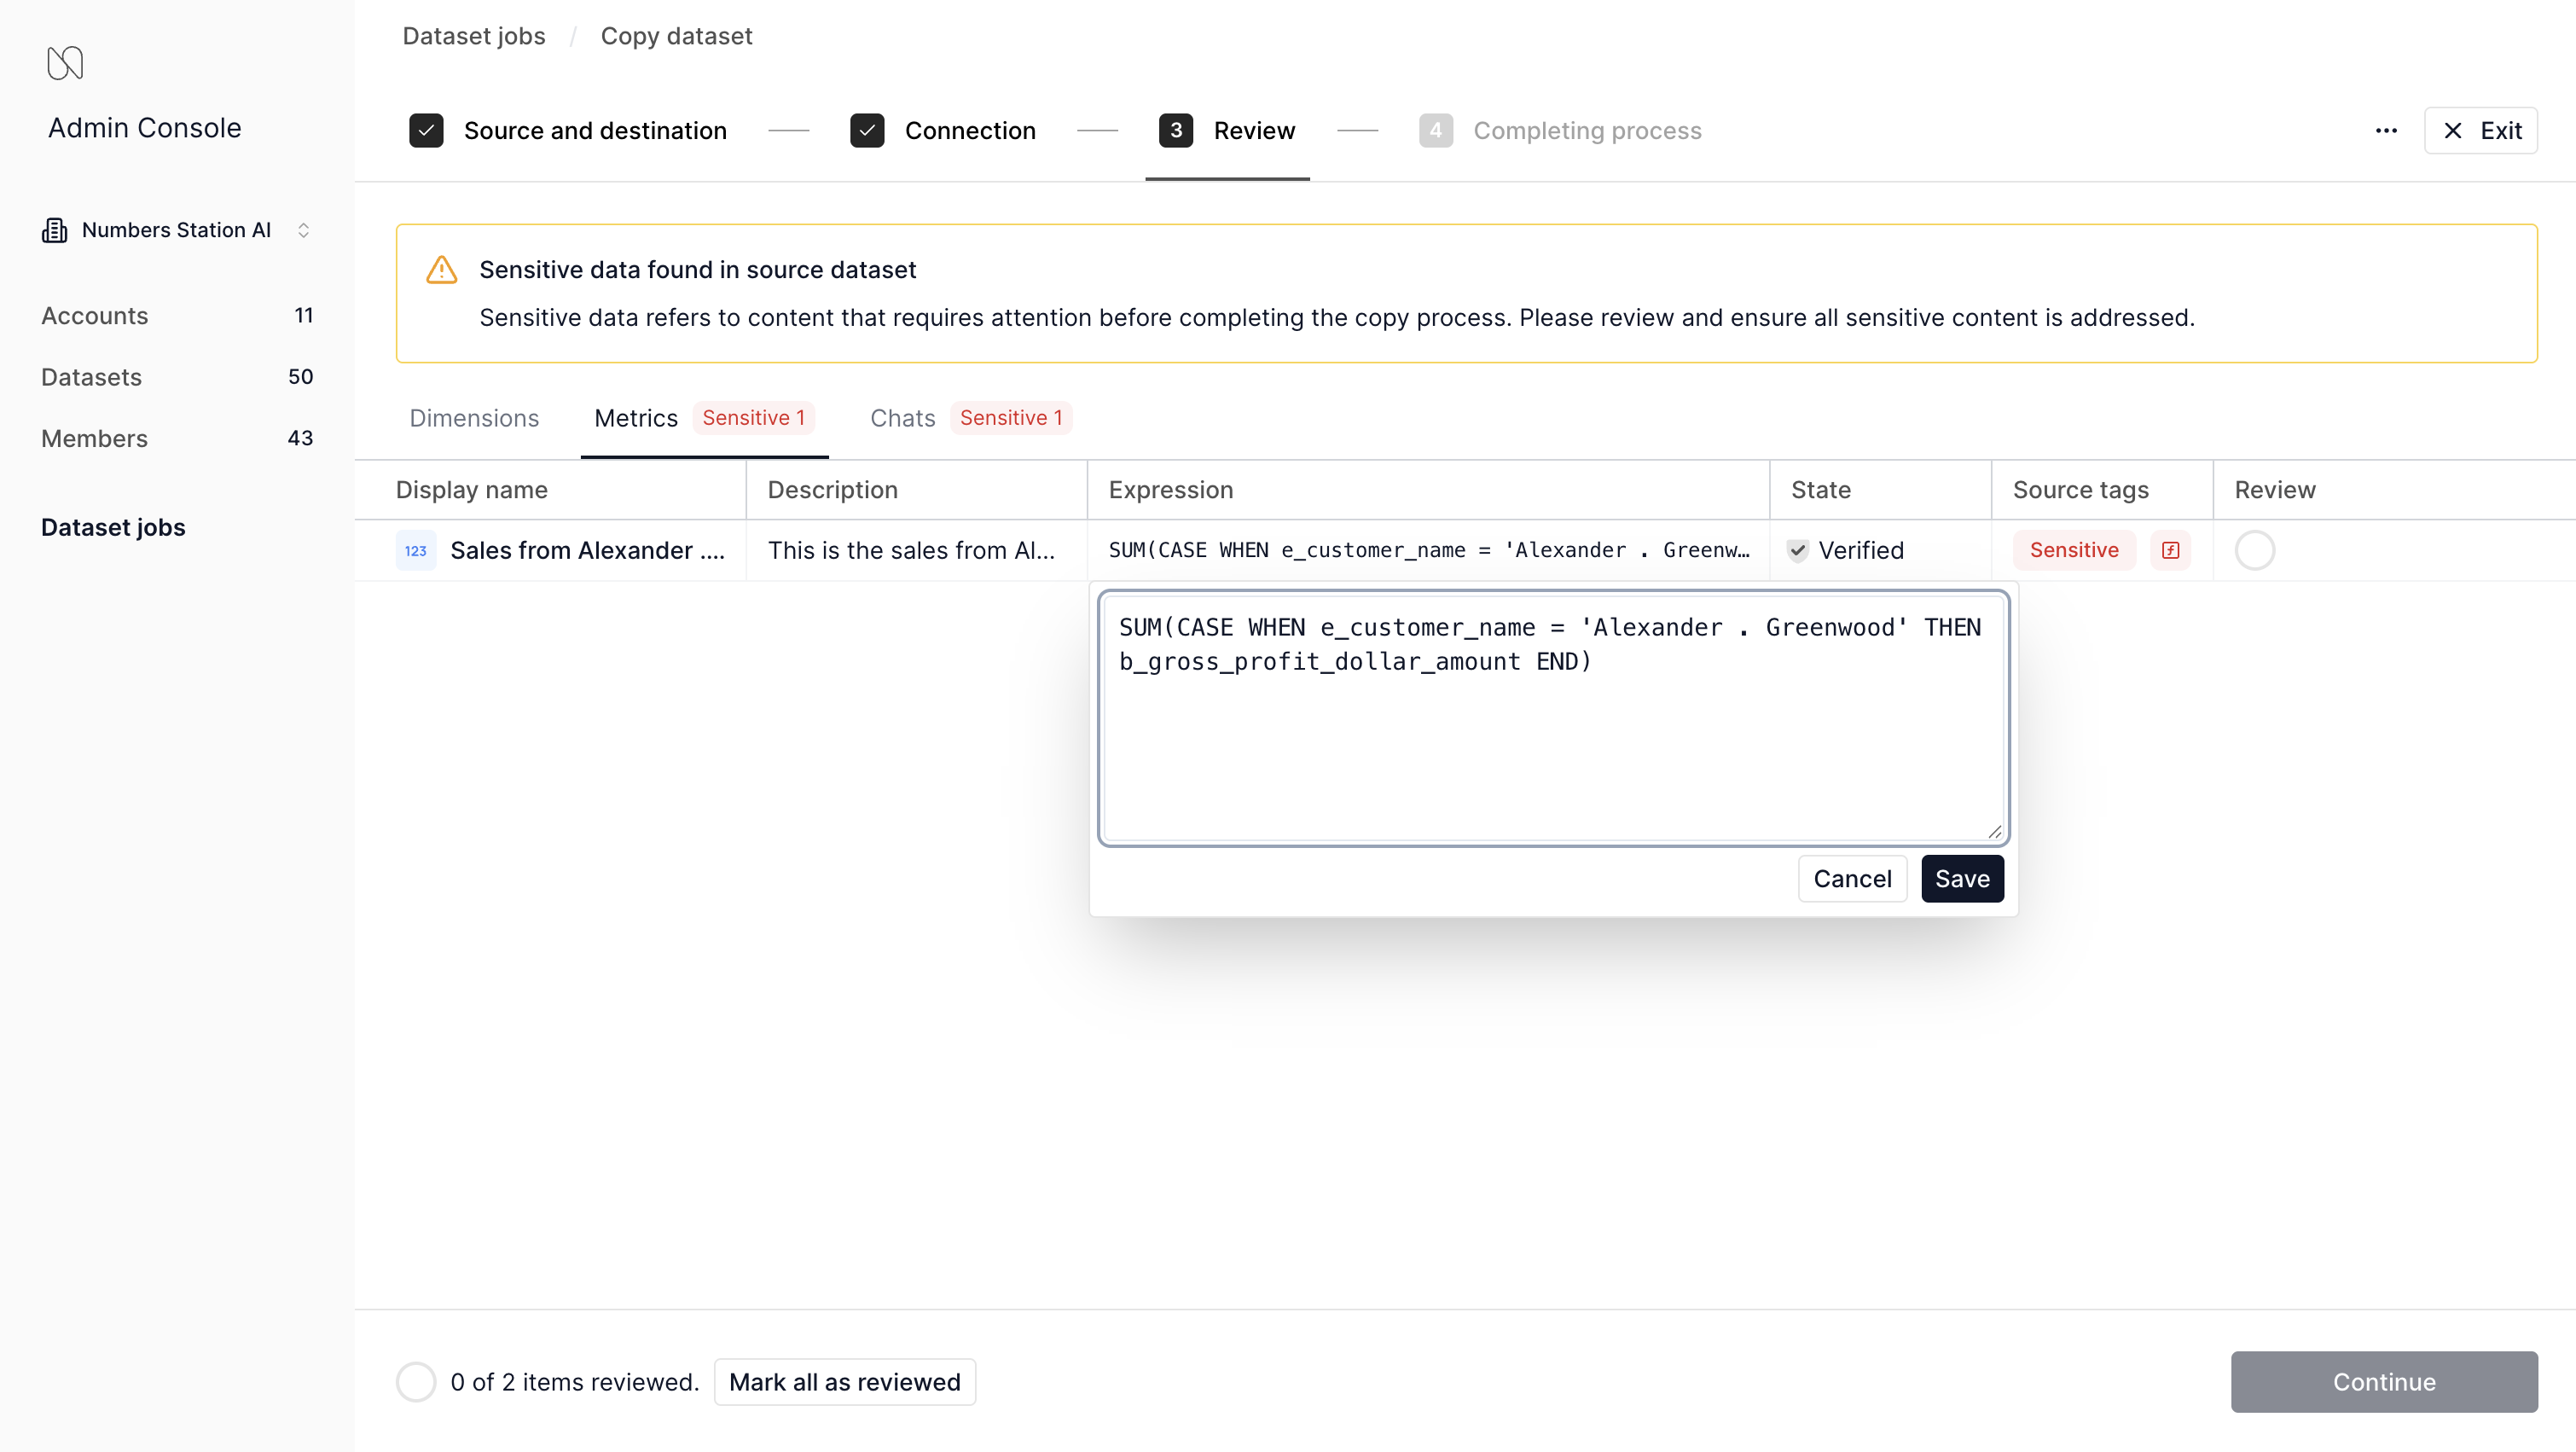
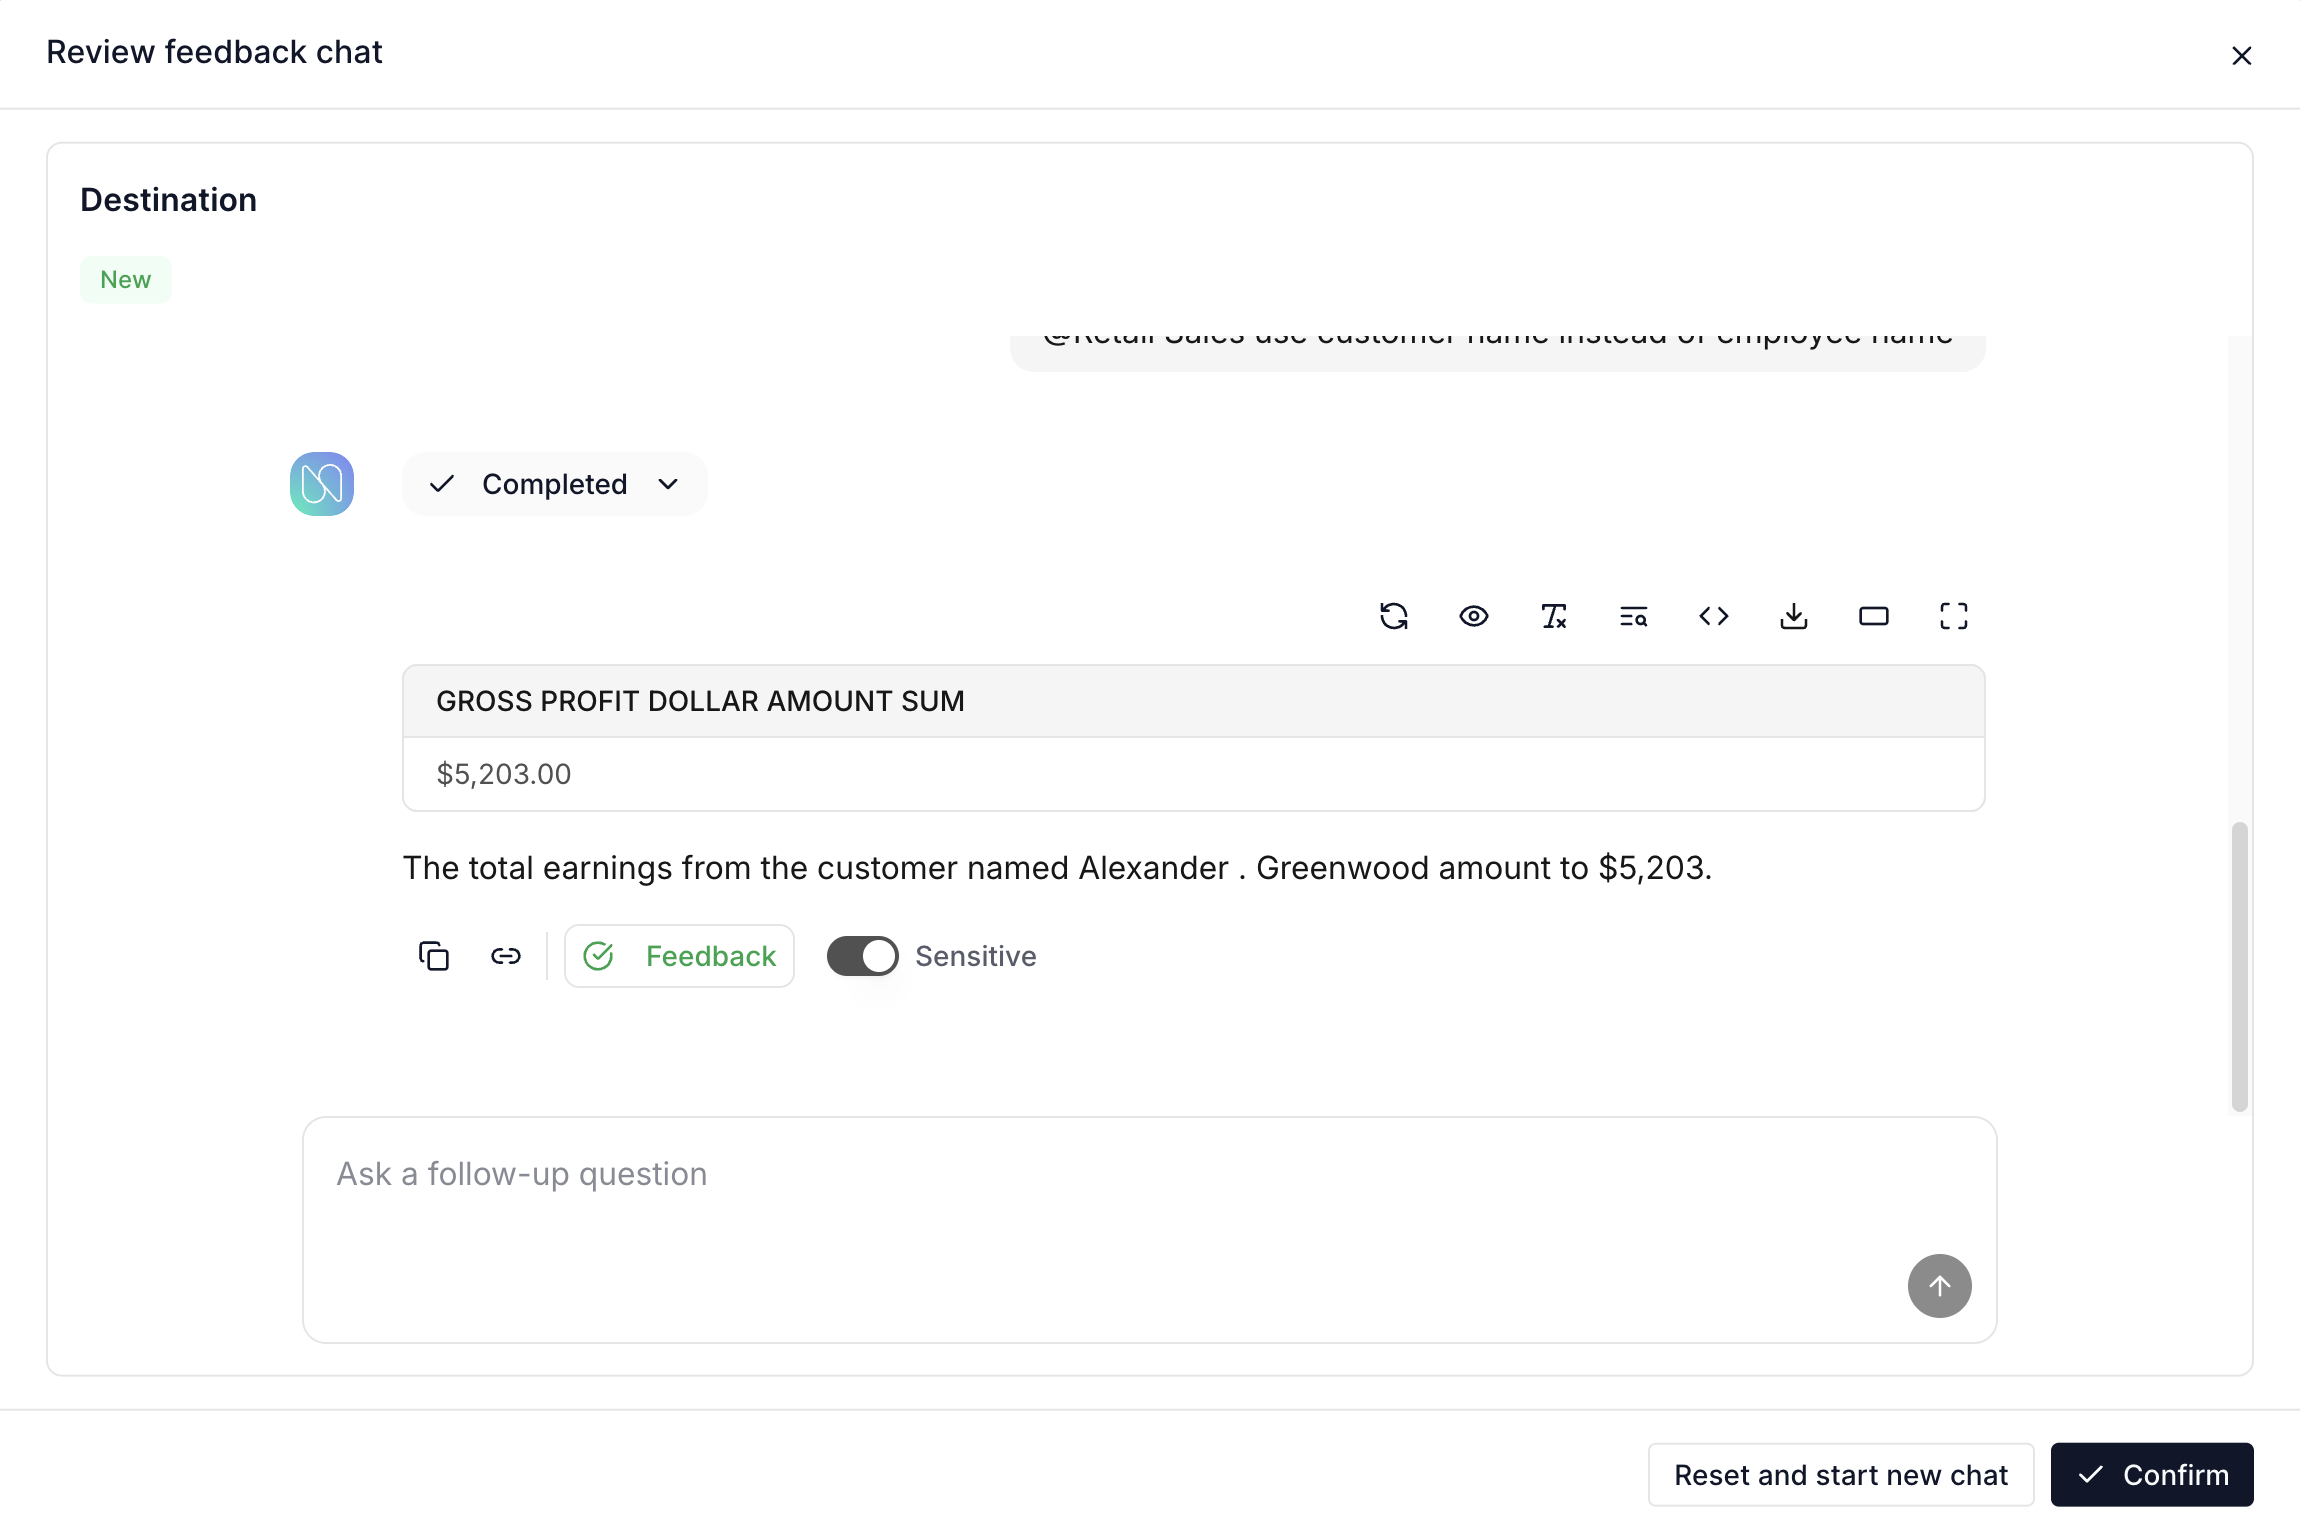
- Once all changes are confirmed, the copy job can proceed.
- When completed, the copy job will display a report with smoke tests that confirm whether there were any regressions in quality, and the copied dataset will enter the
Draftstate.
Updating a Dataset
Updating a dataset is how enterprise admins can distribute incremental updates from the base dataset in the base account to a customer's account. Importantly, Numbers Station works to minimize the effort required by enterprise admins when reviewing these updates. For example, the system will indicate different types of updates (e.g., new additions, updates from the source, conflicts, etc.) allowing the enterprise admin to take the appropriate actions.
- Navigate to the Enterprise Admin Console and then "Dataset jobs" within the console.
- Click on update dataset.
- Start update, selecting source and destination datasets.
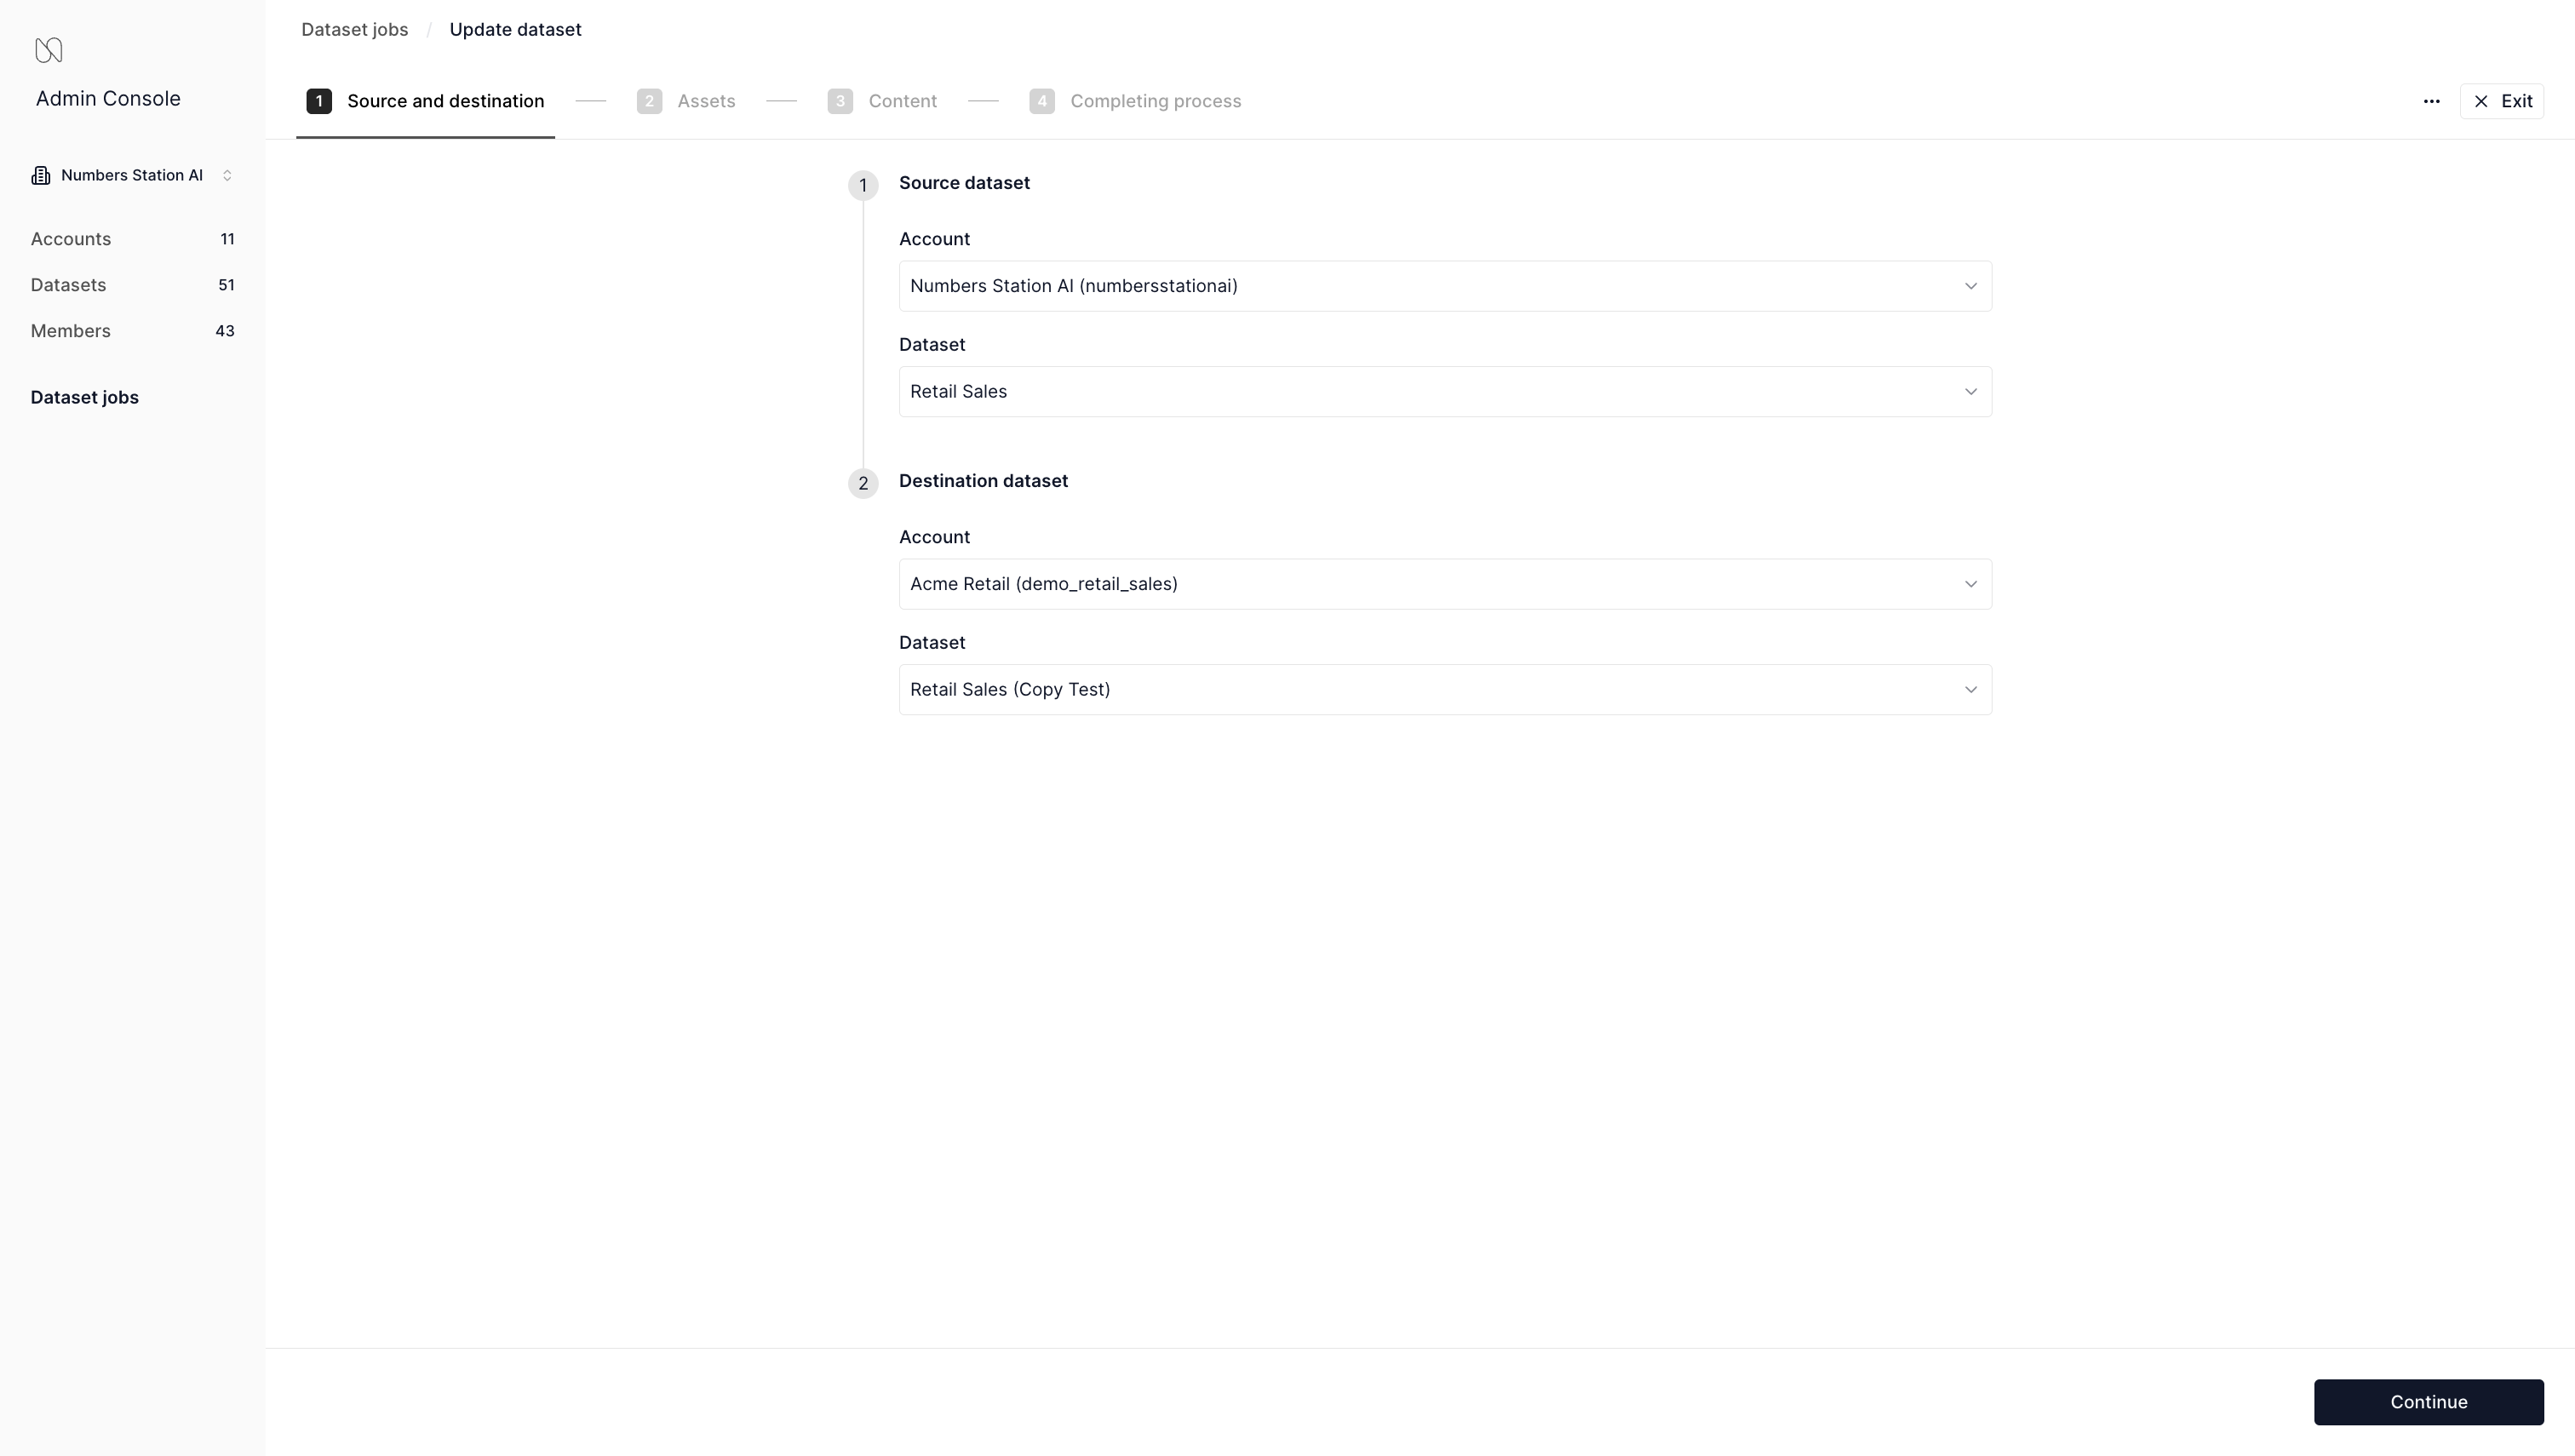
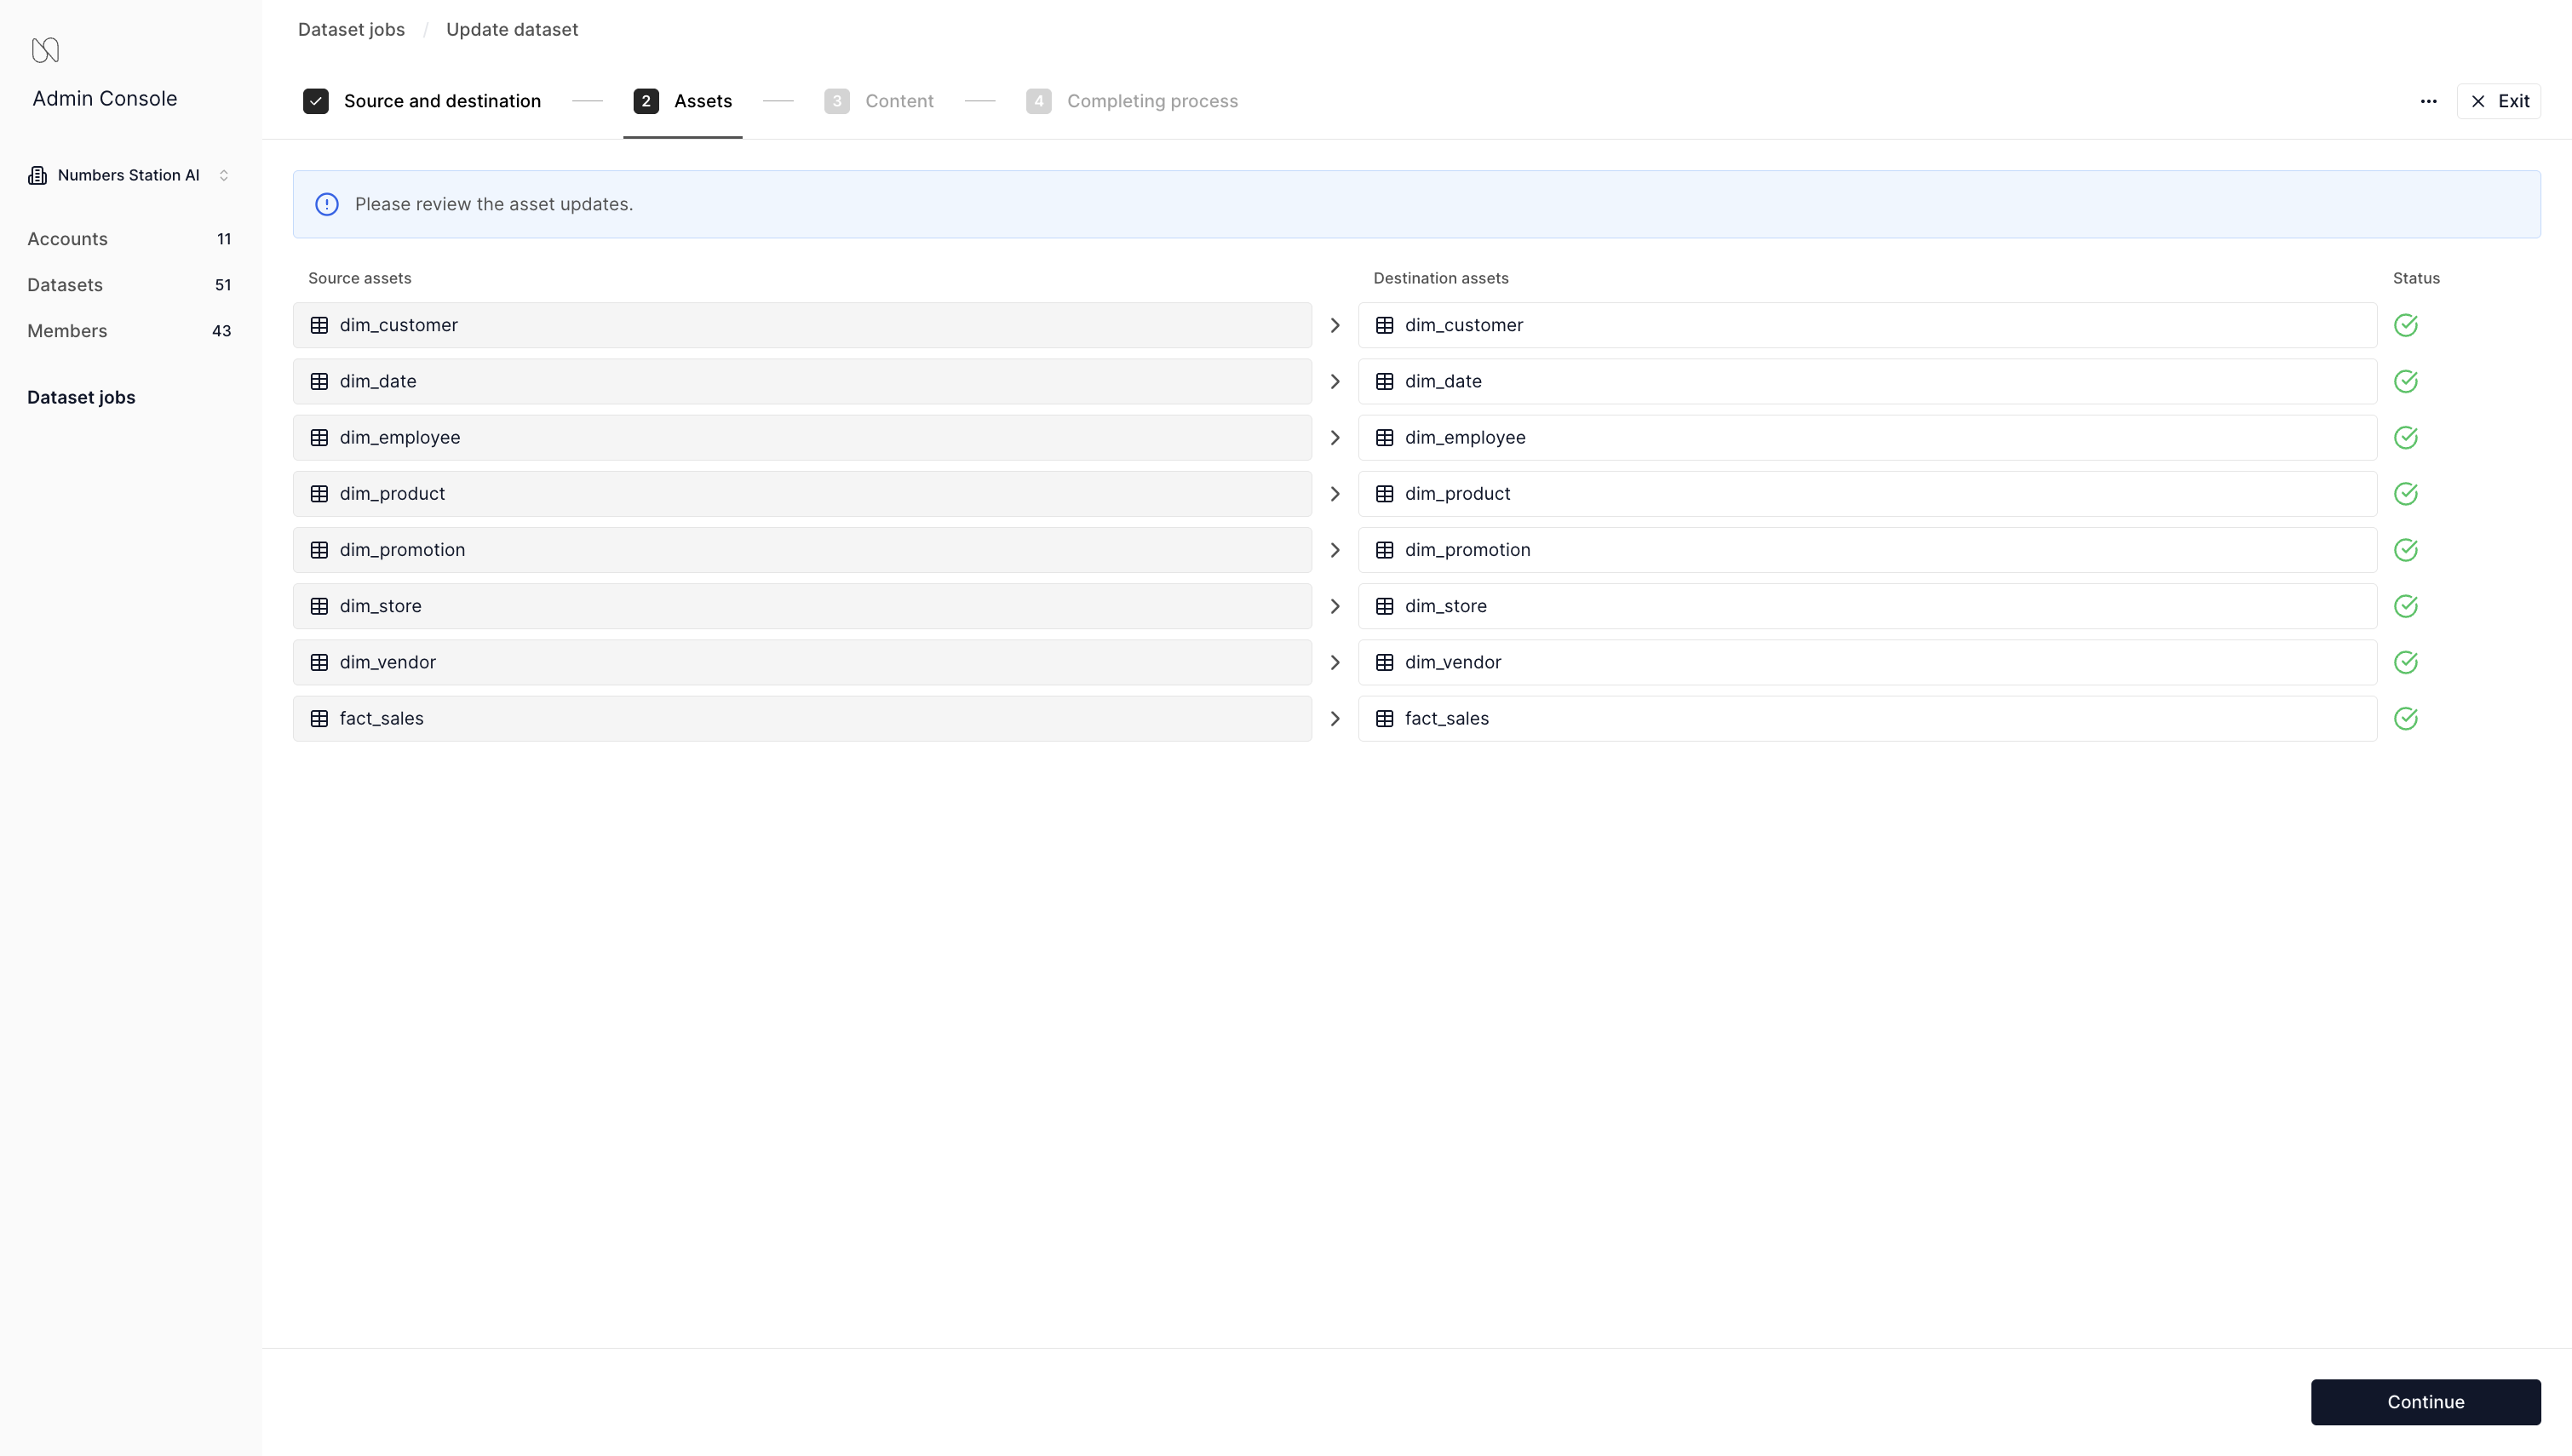
- The system validates the connection and attempts to automatically map the data sources (i.e., the tables and views) from the connection.
- The update job will run, showing progress as it goes.
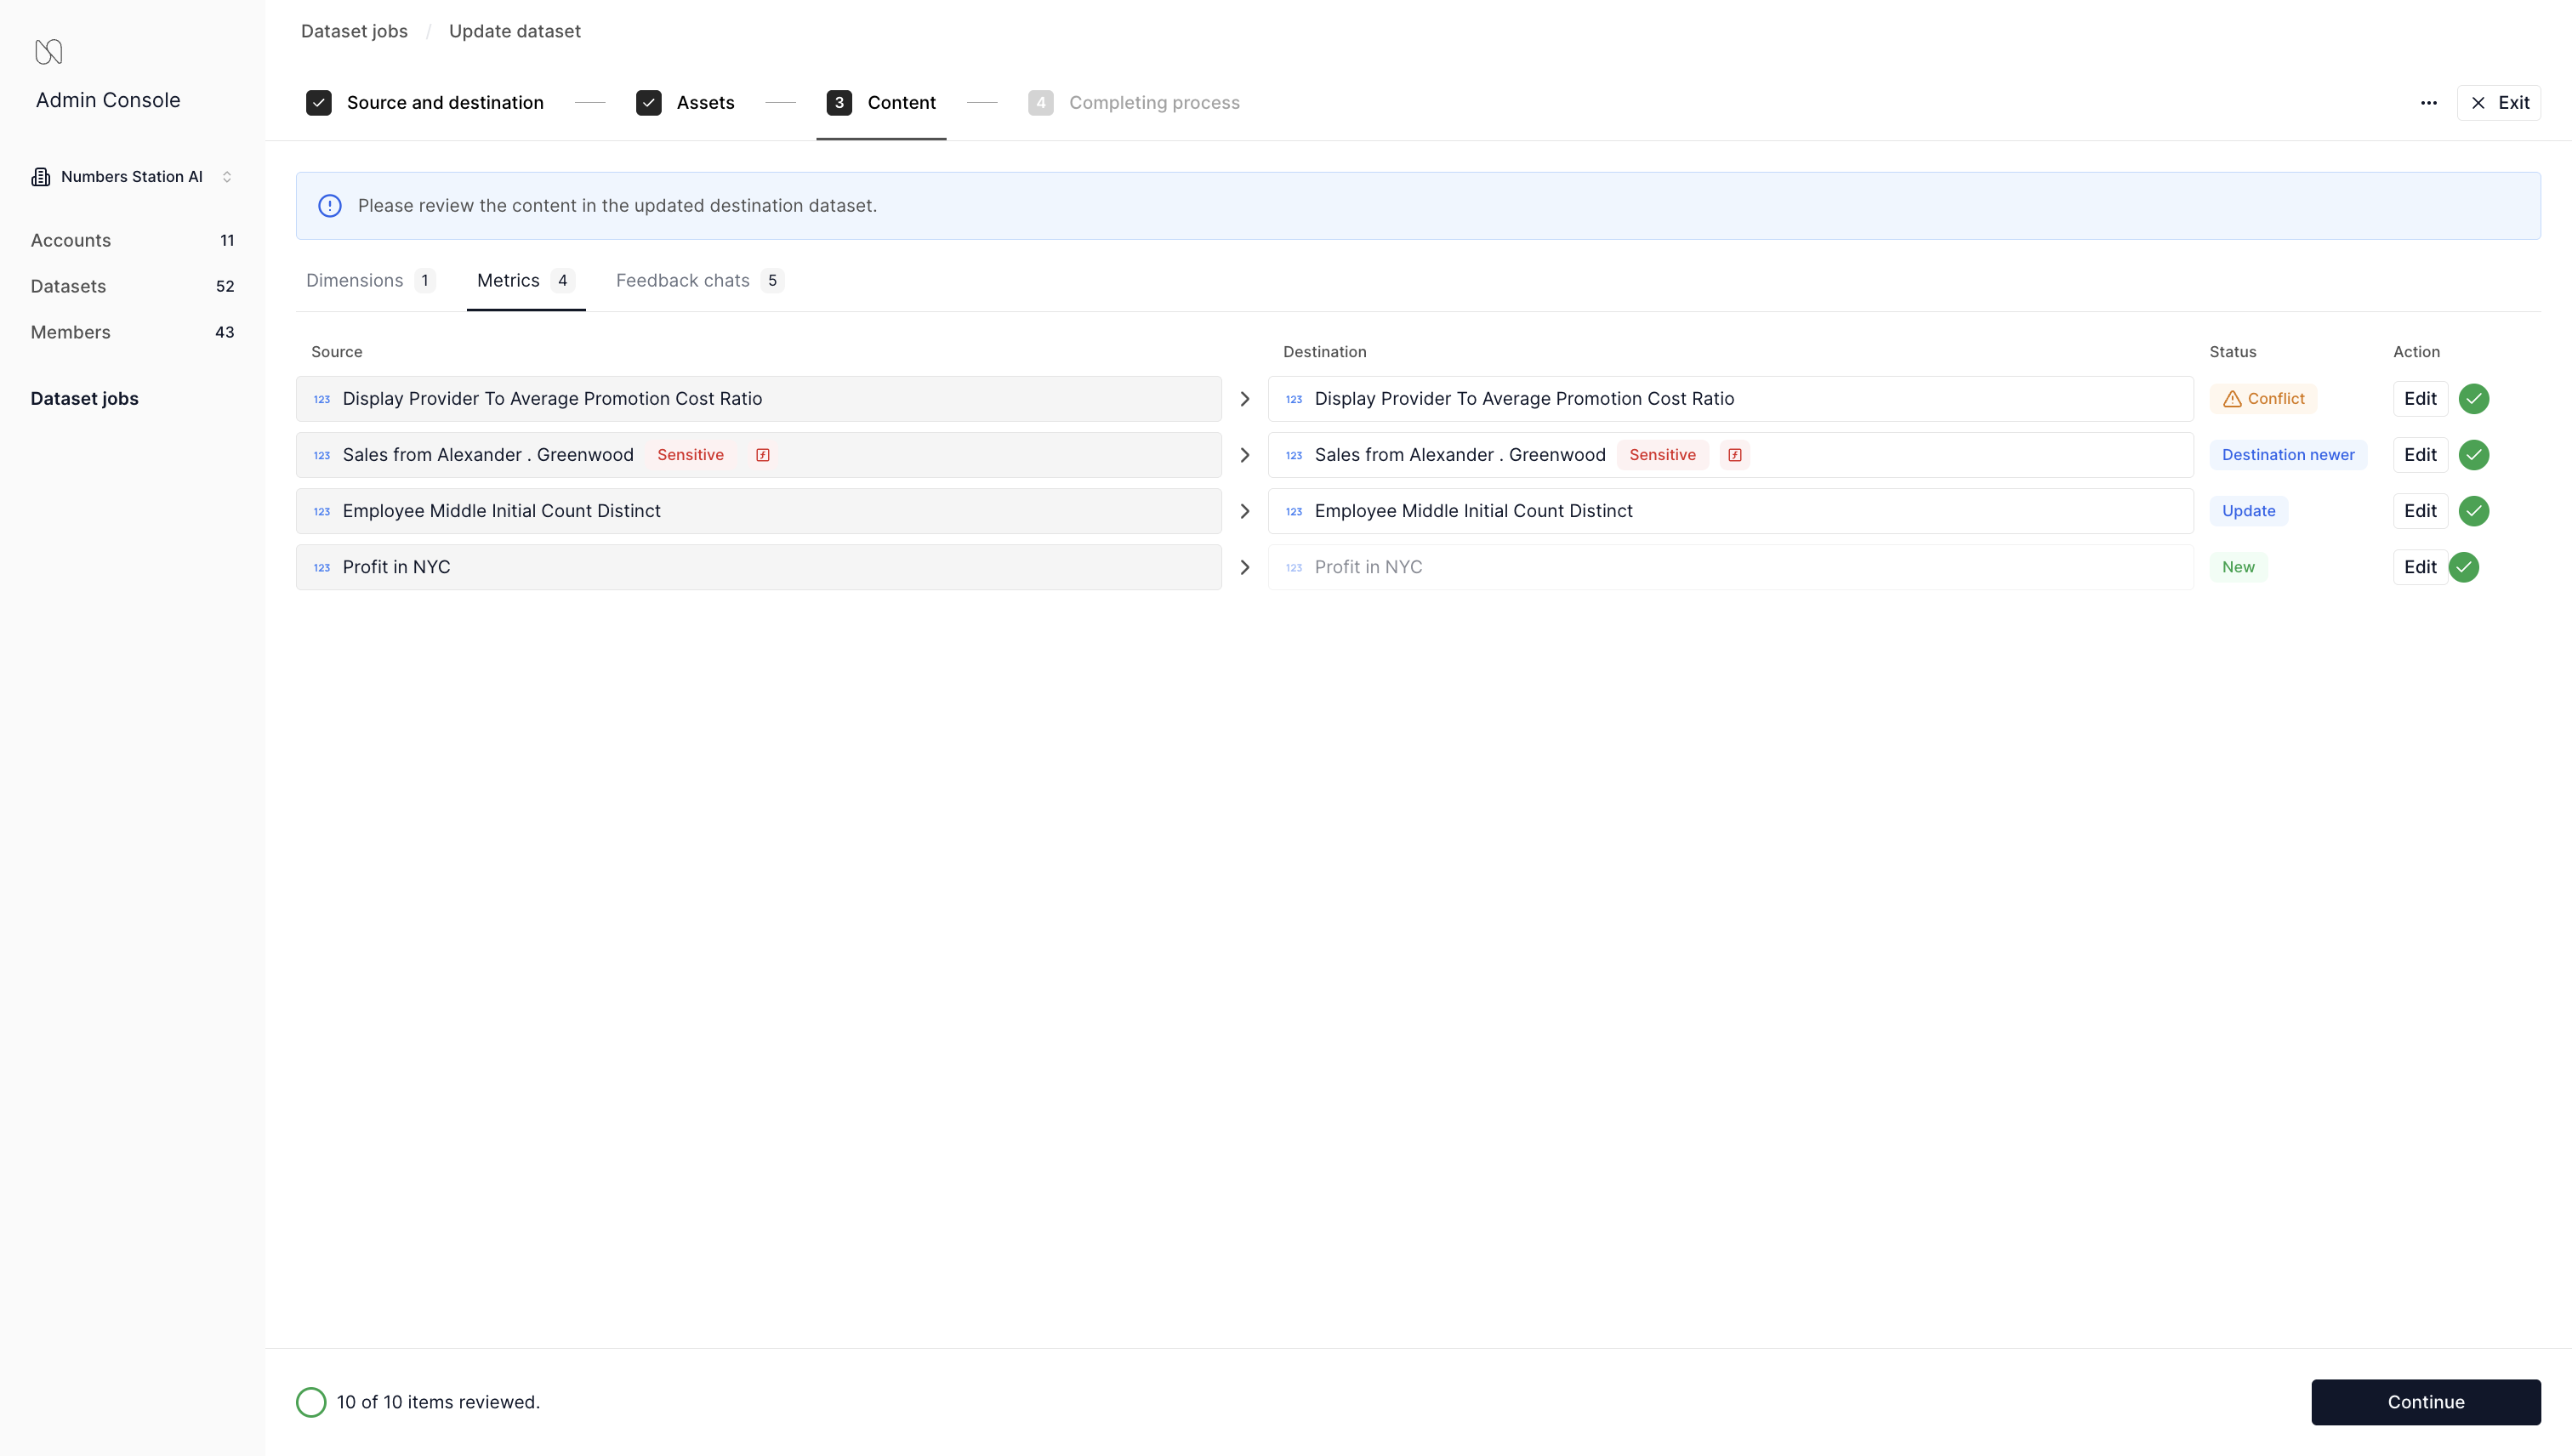
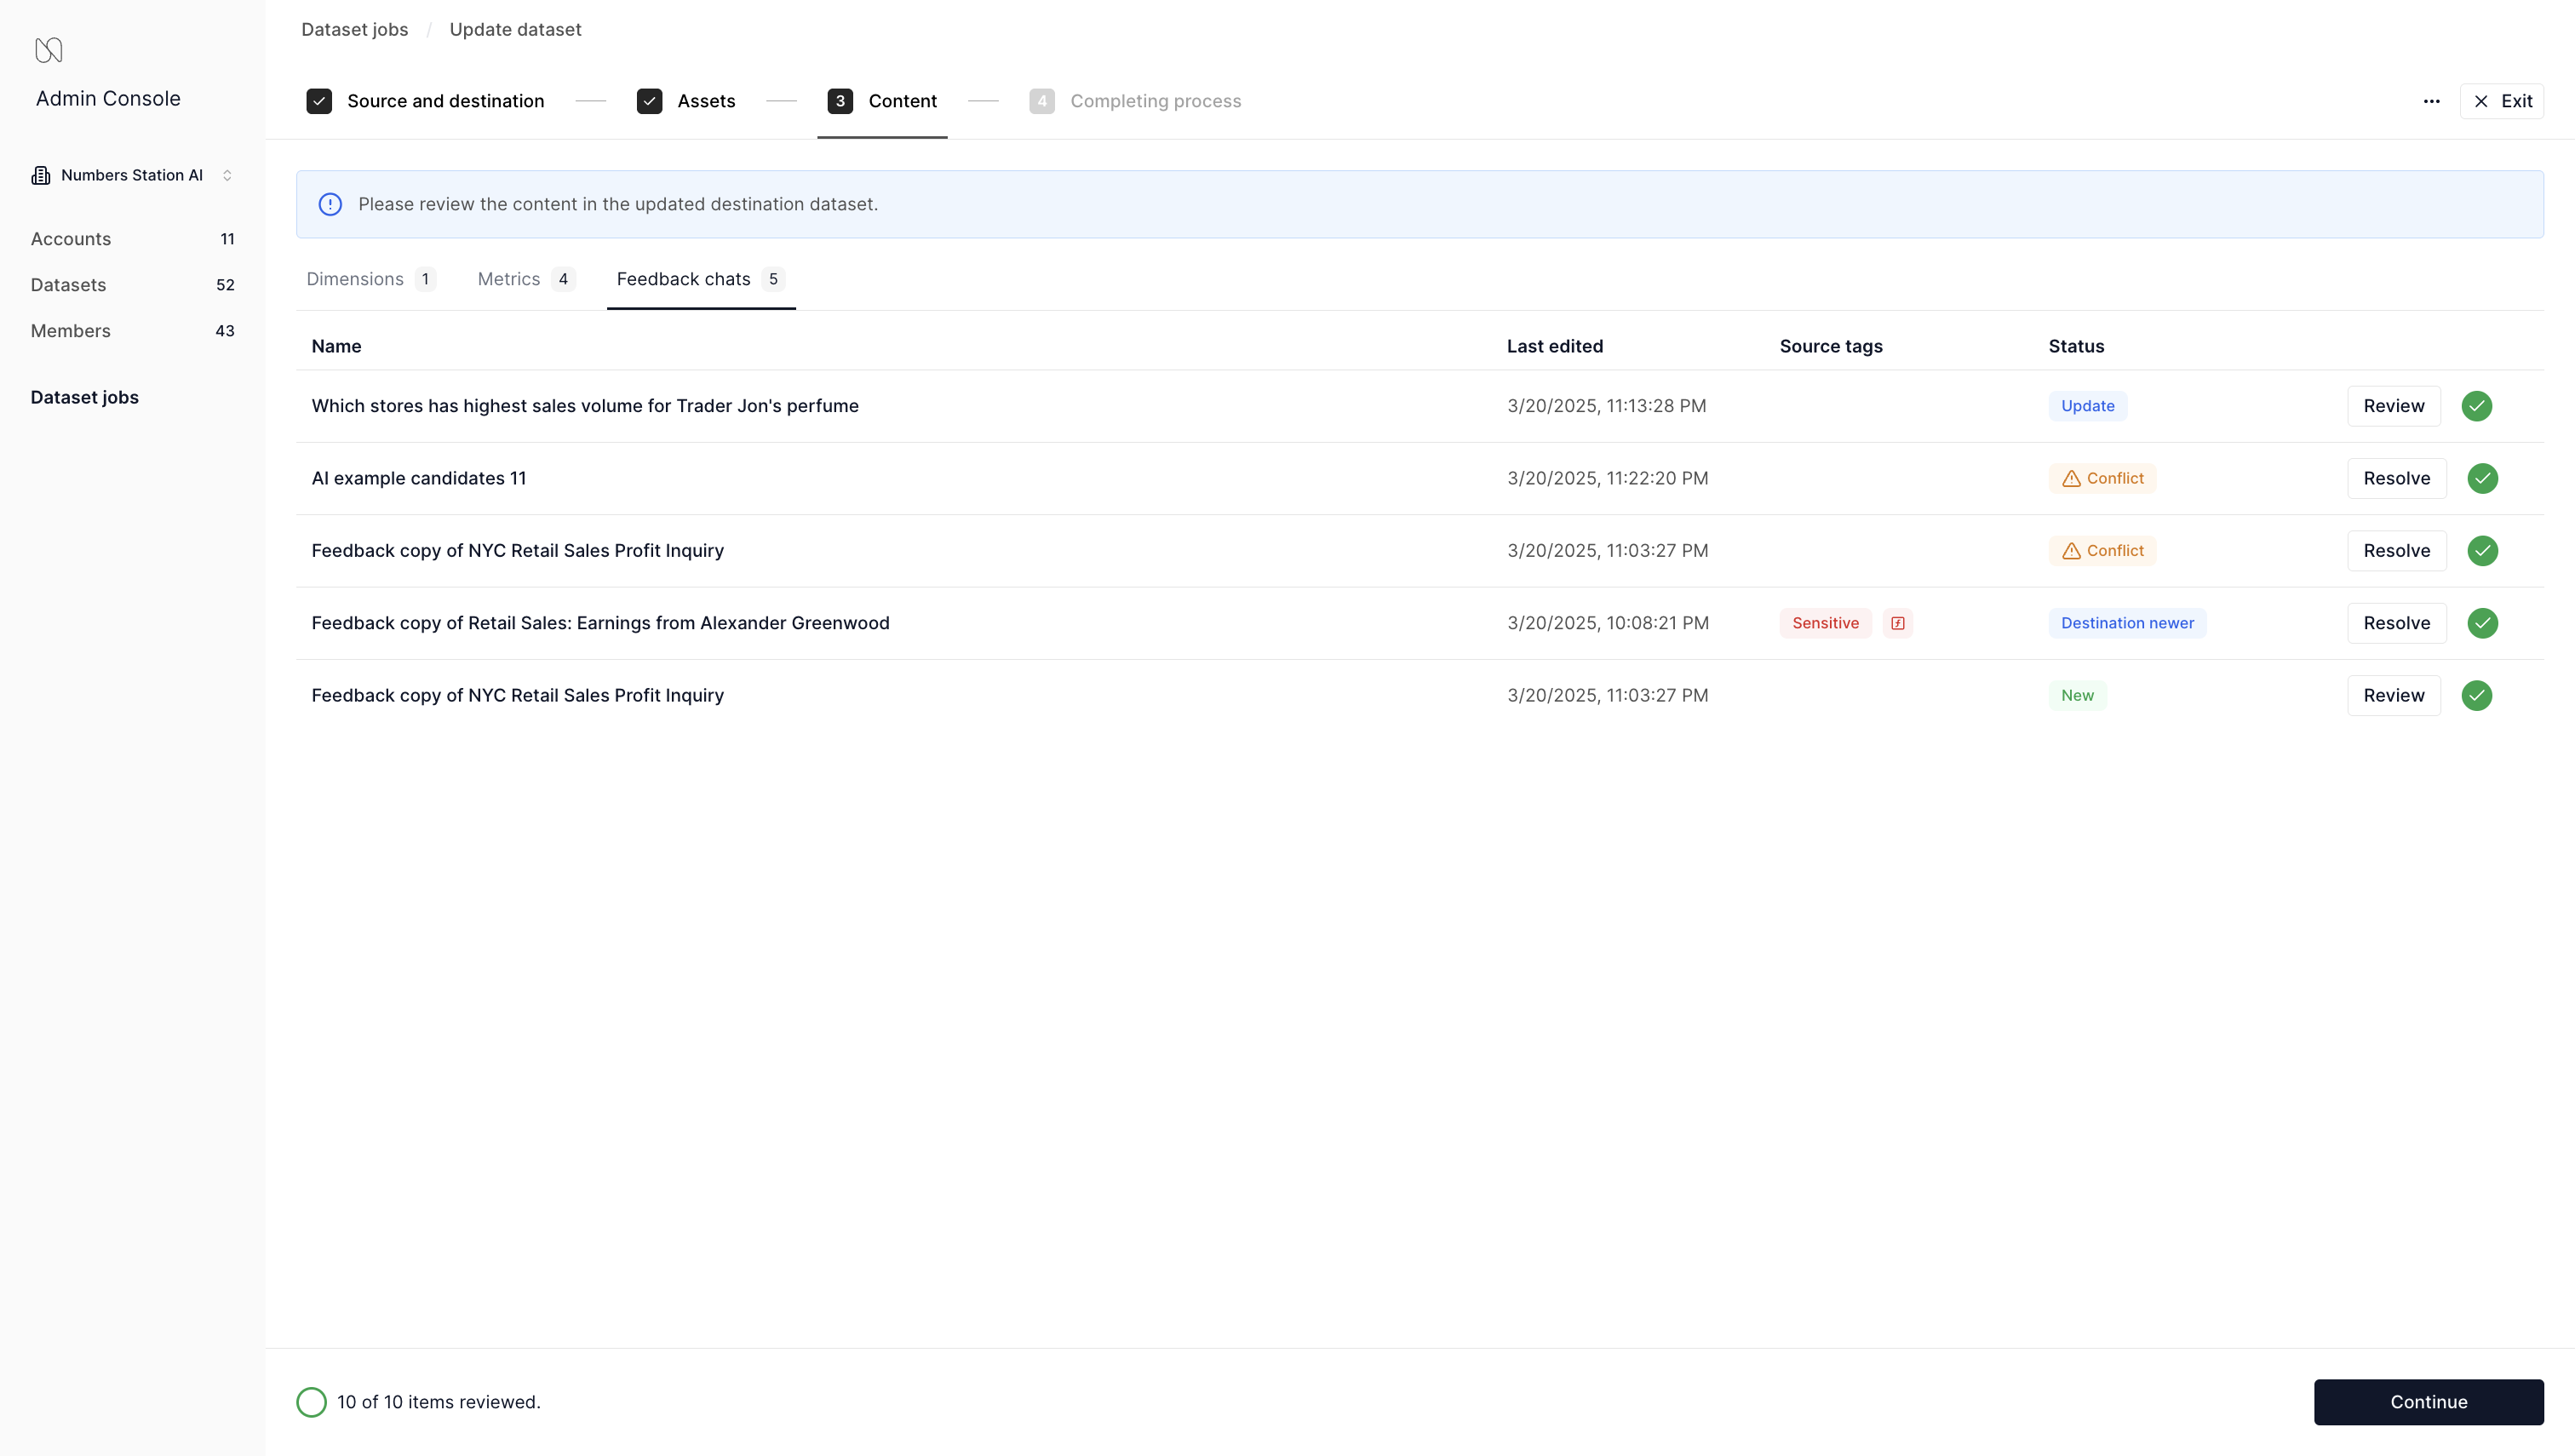
- Next, the system shows the dimensions, metrics, and feedback chats that were affected by the update, and will tag items accordingly (e.g., "New", "Update", "Destination Newer", and "Conflict").
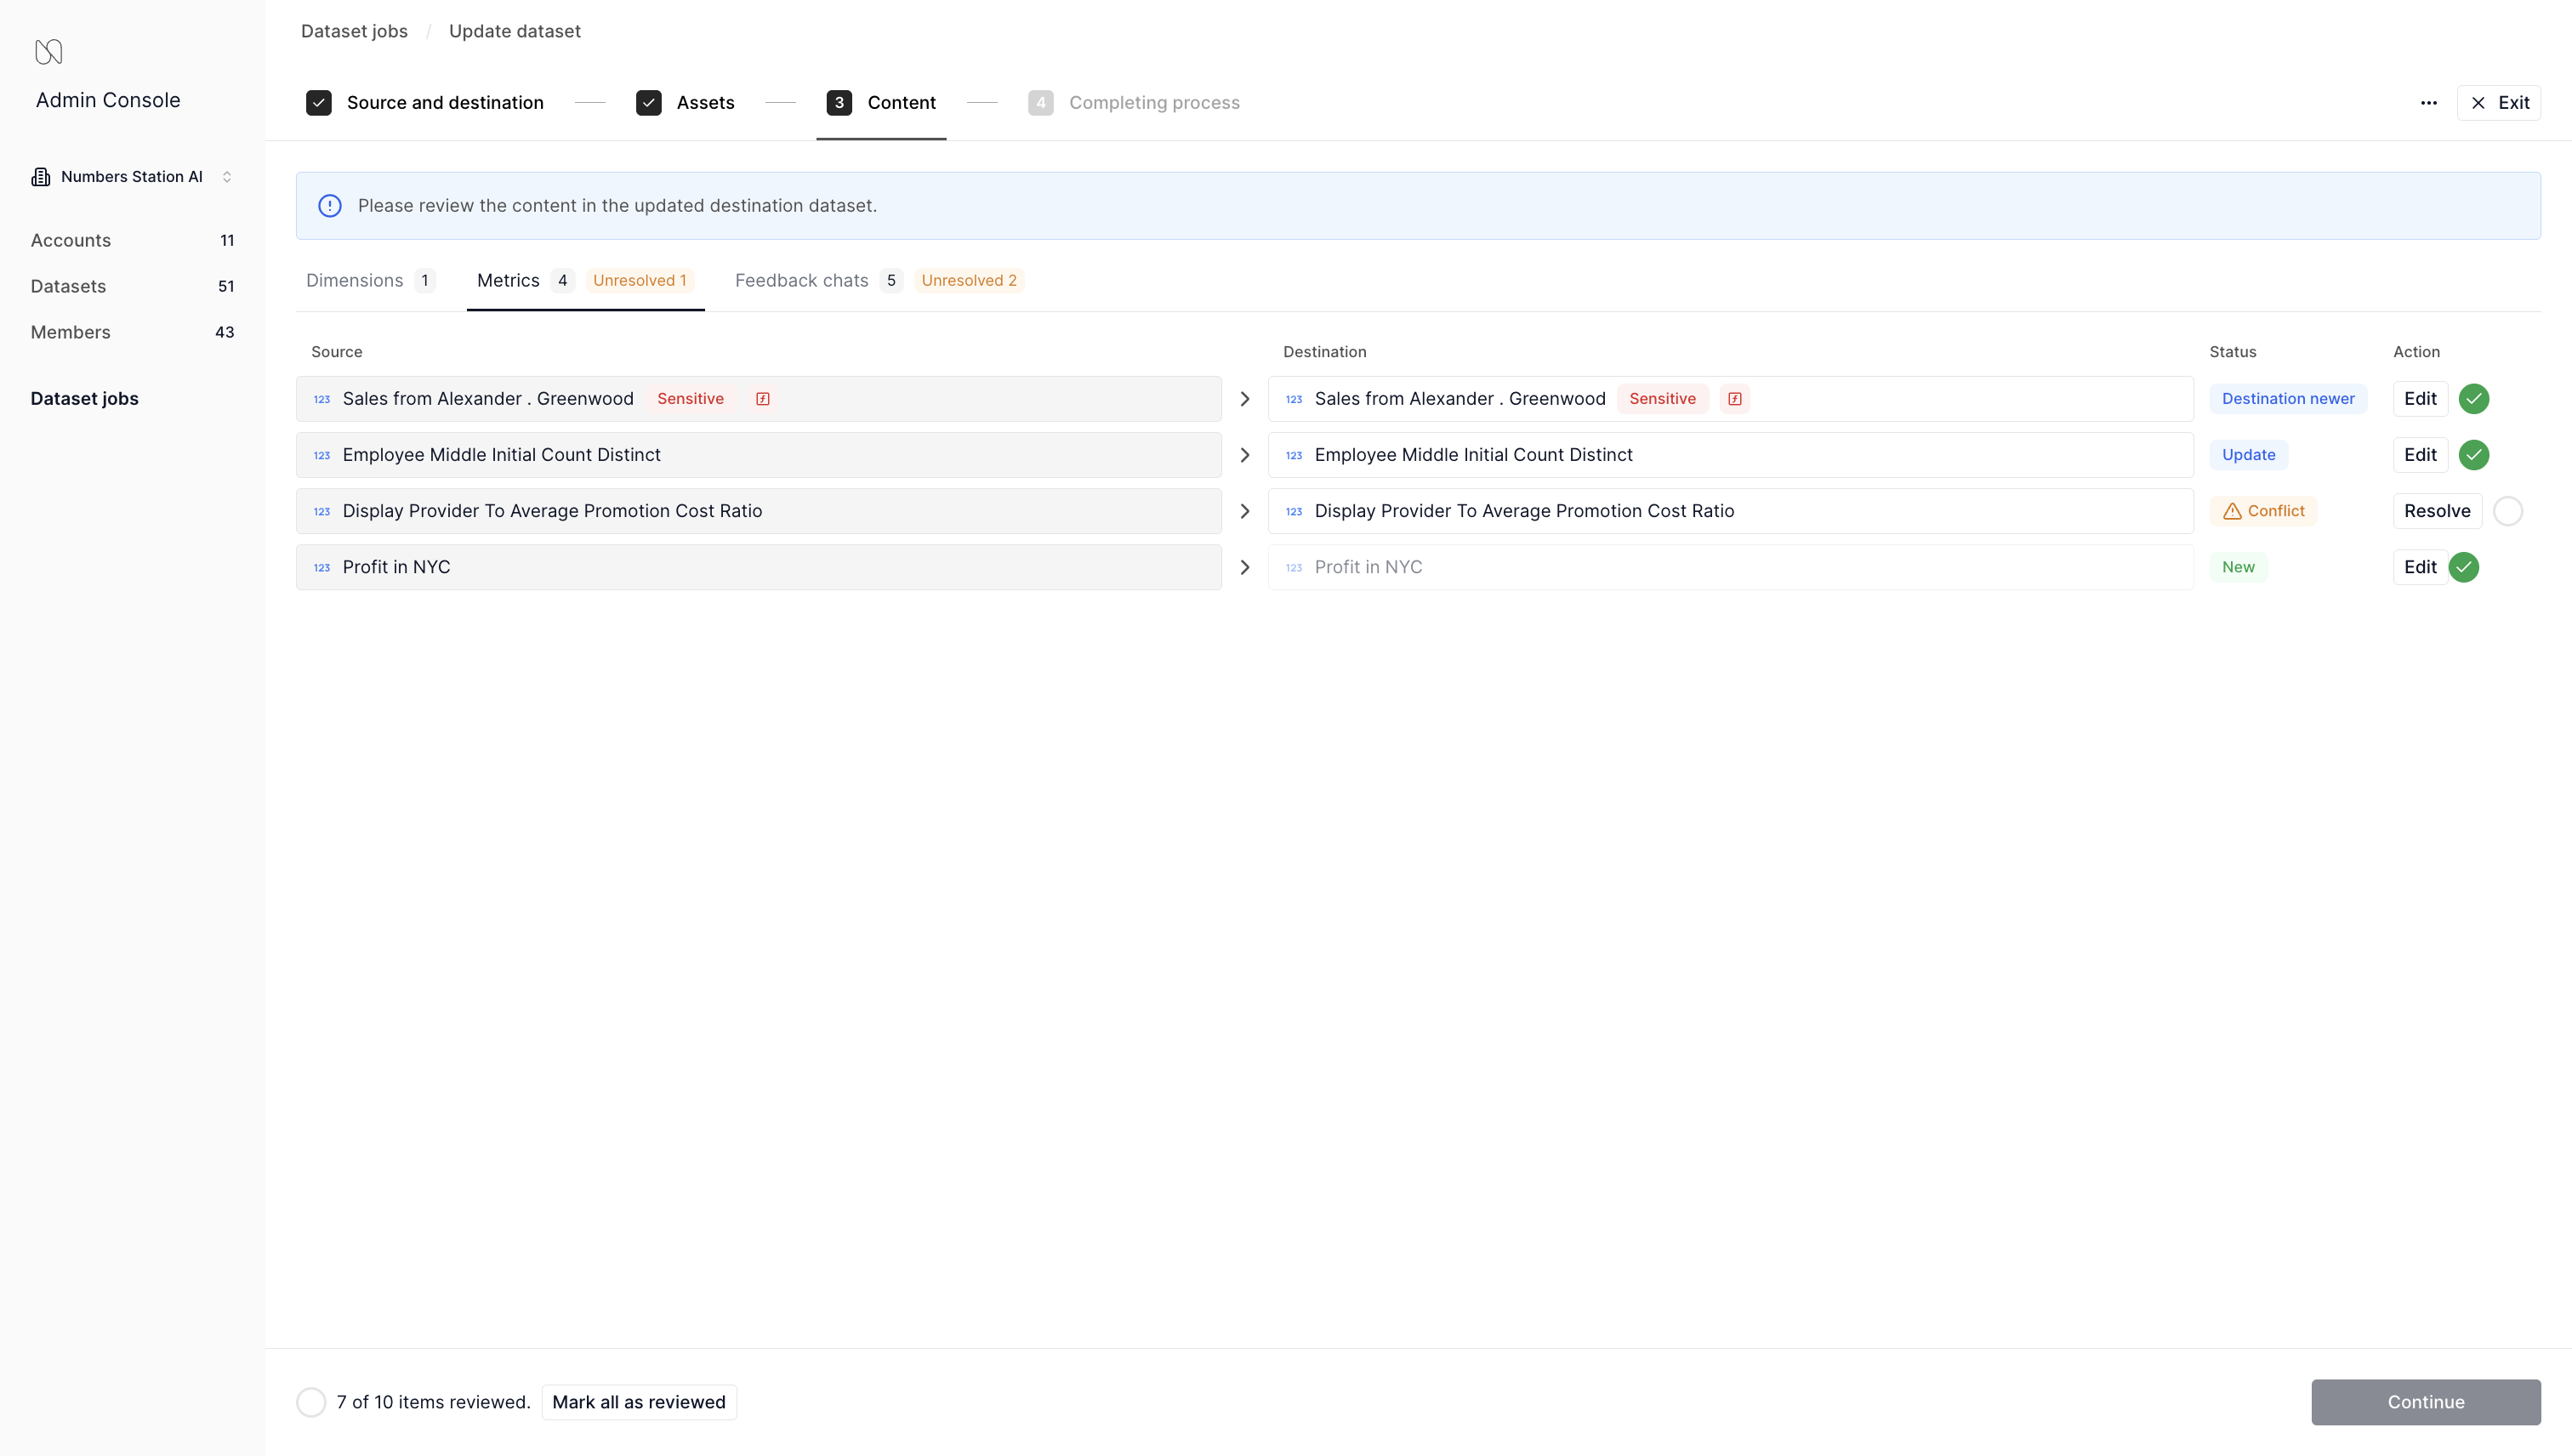
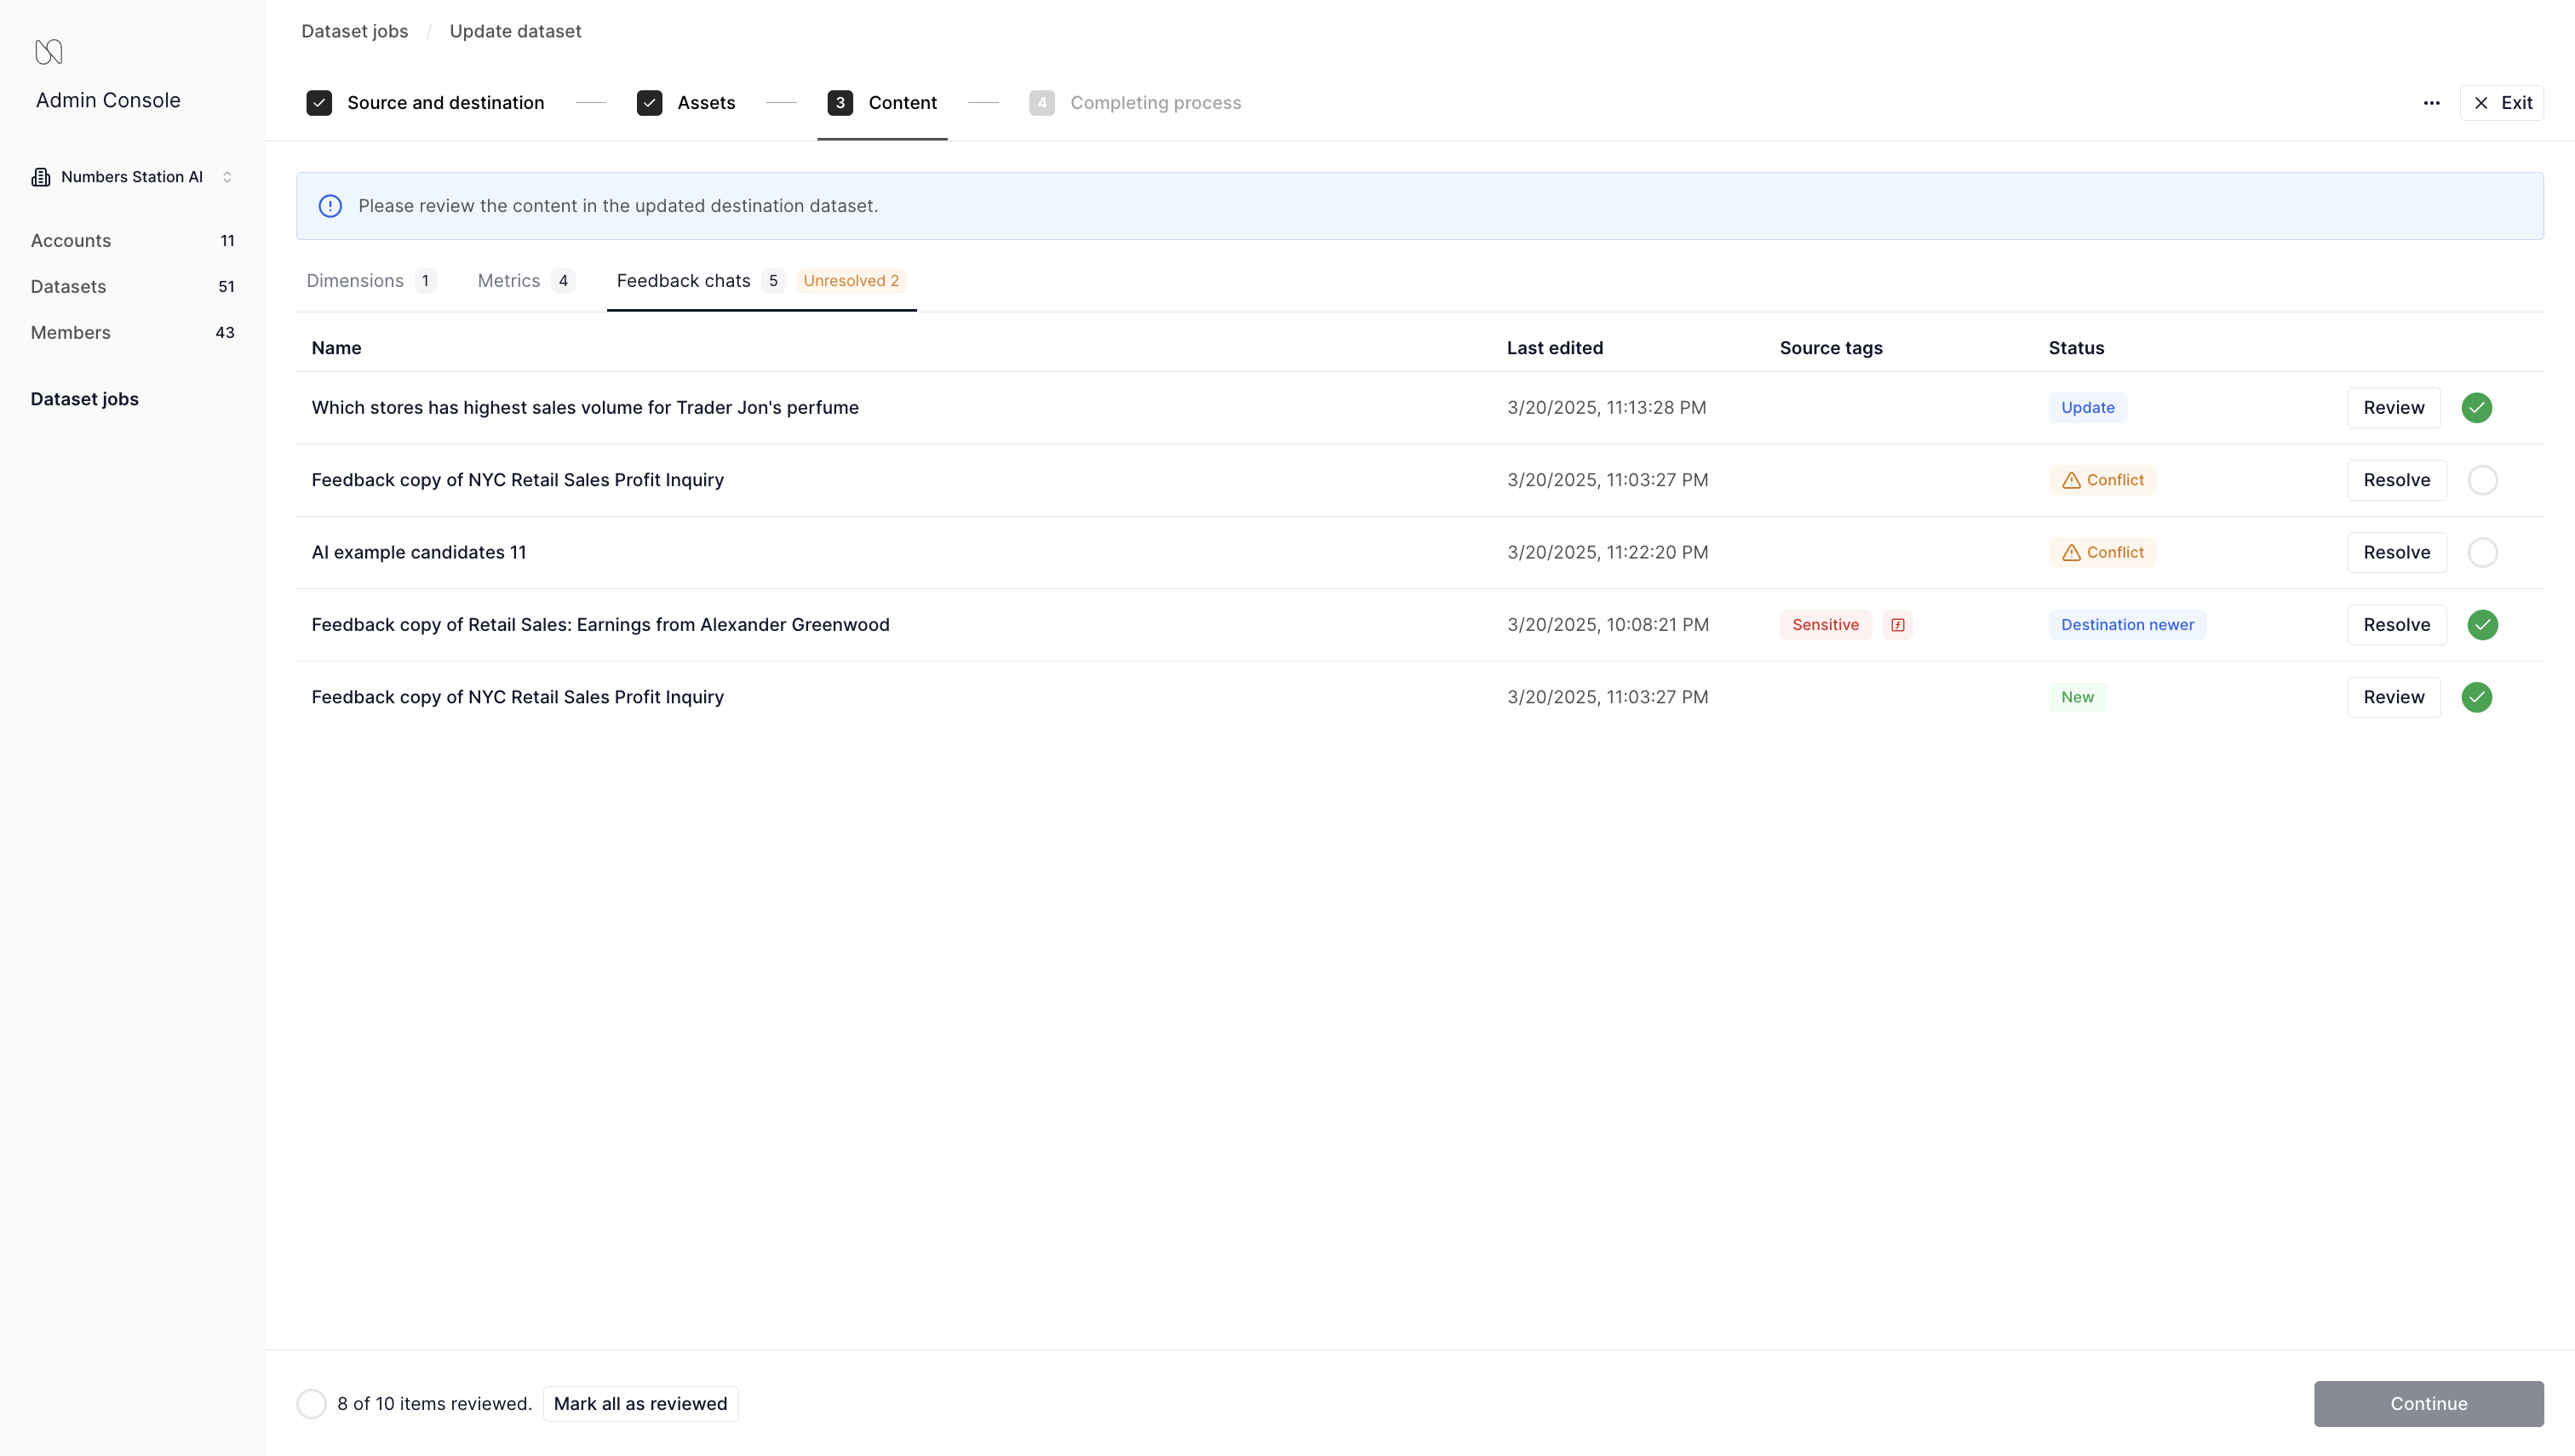
- While any of these can be edited, conflicts must be resolved.
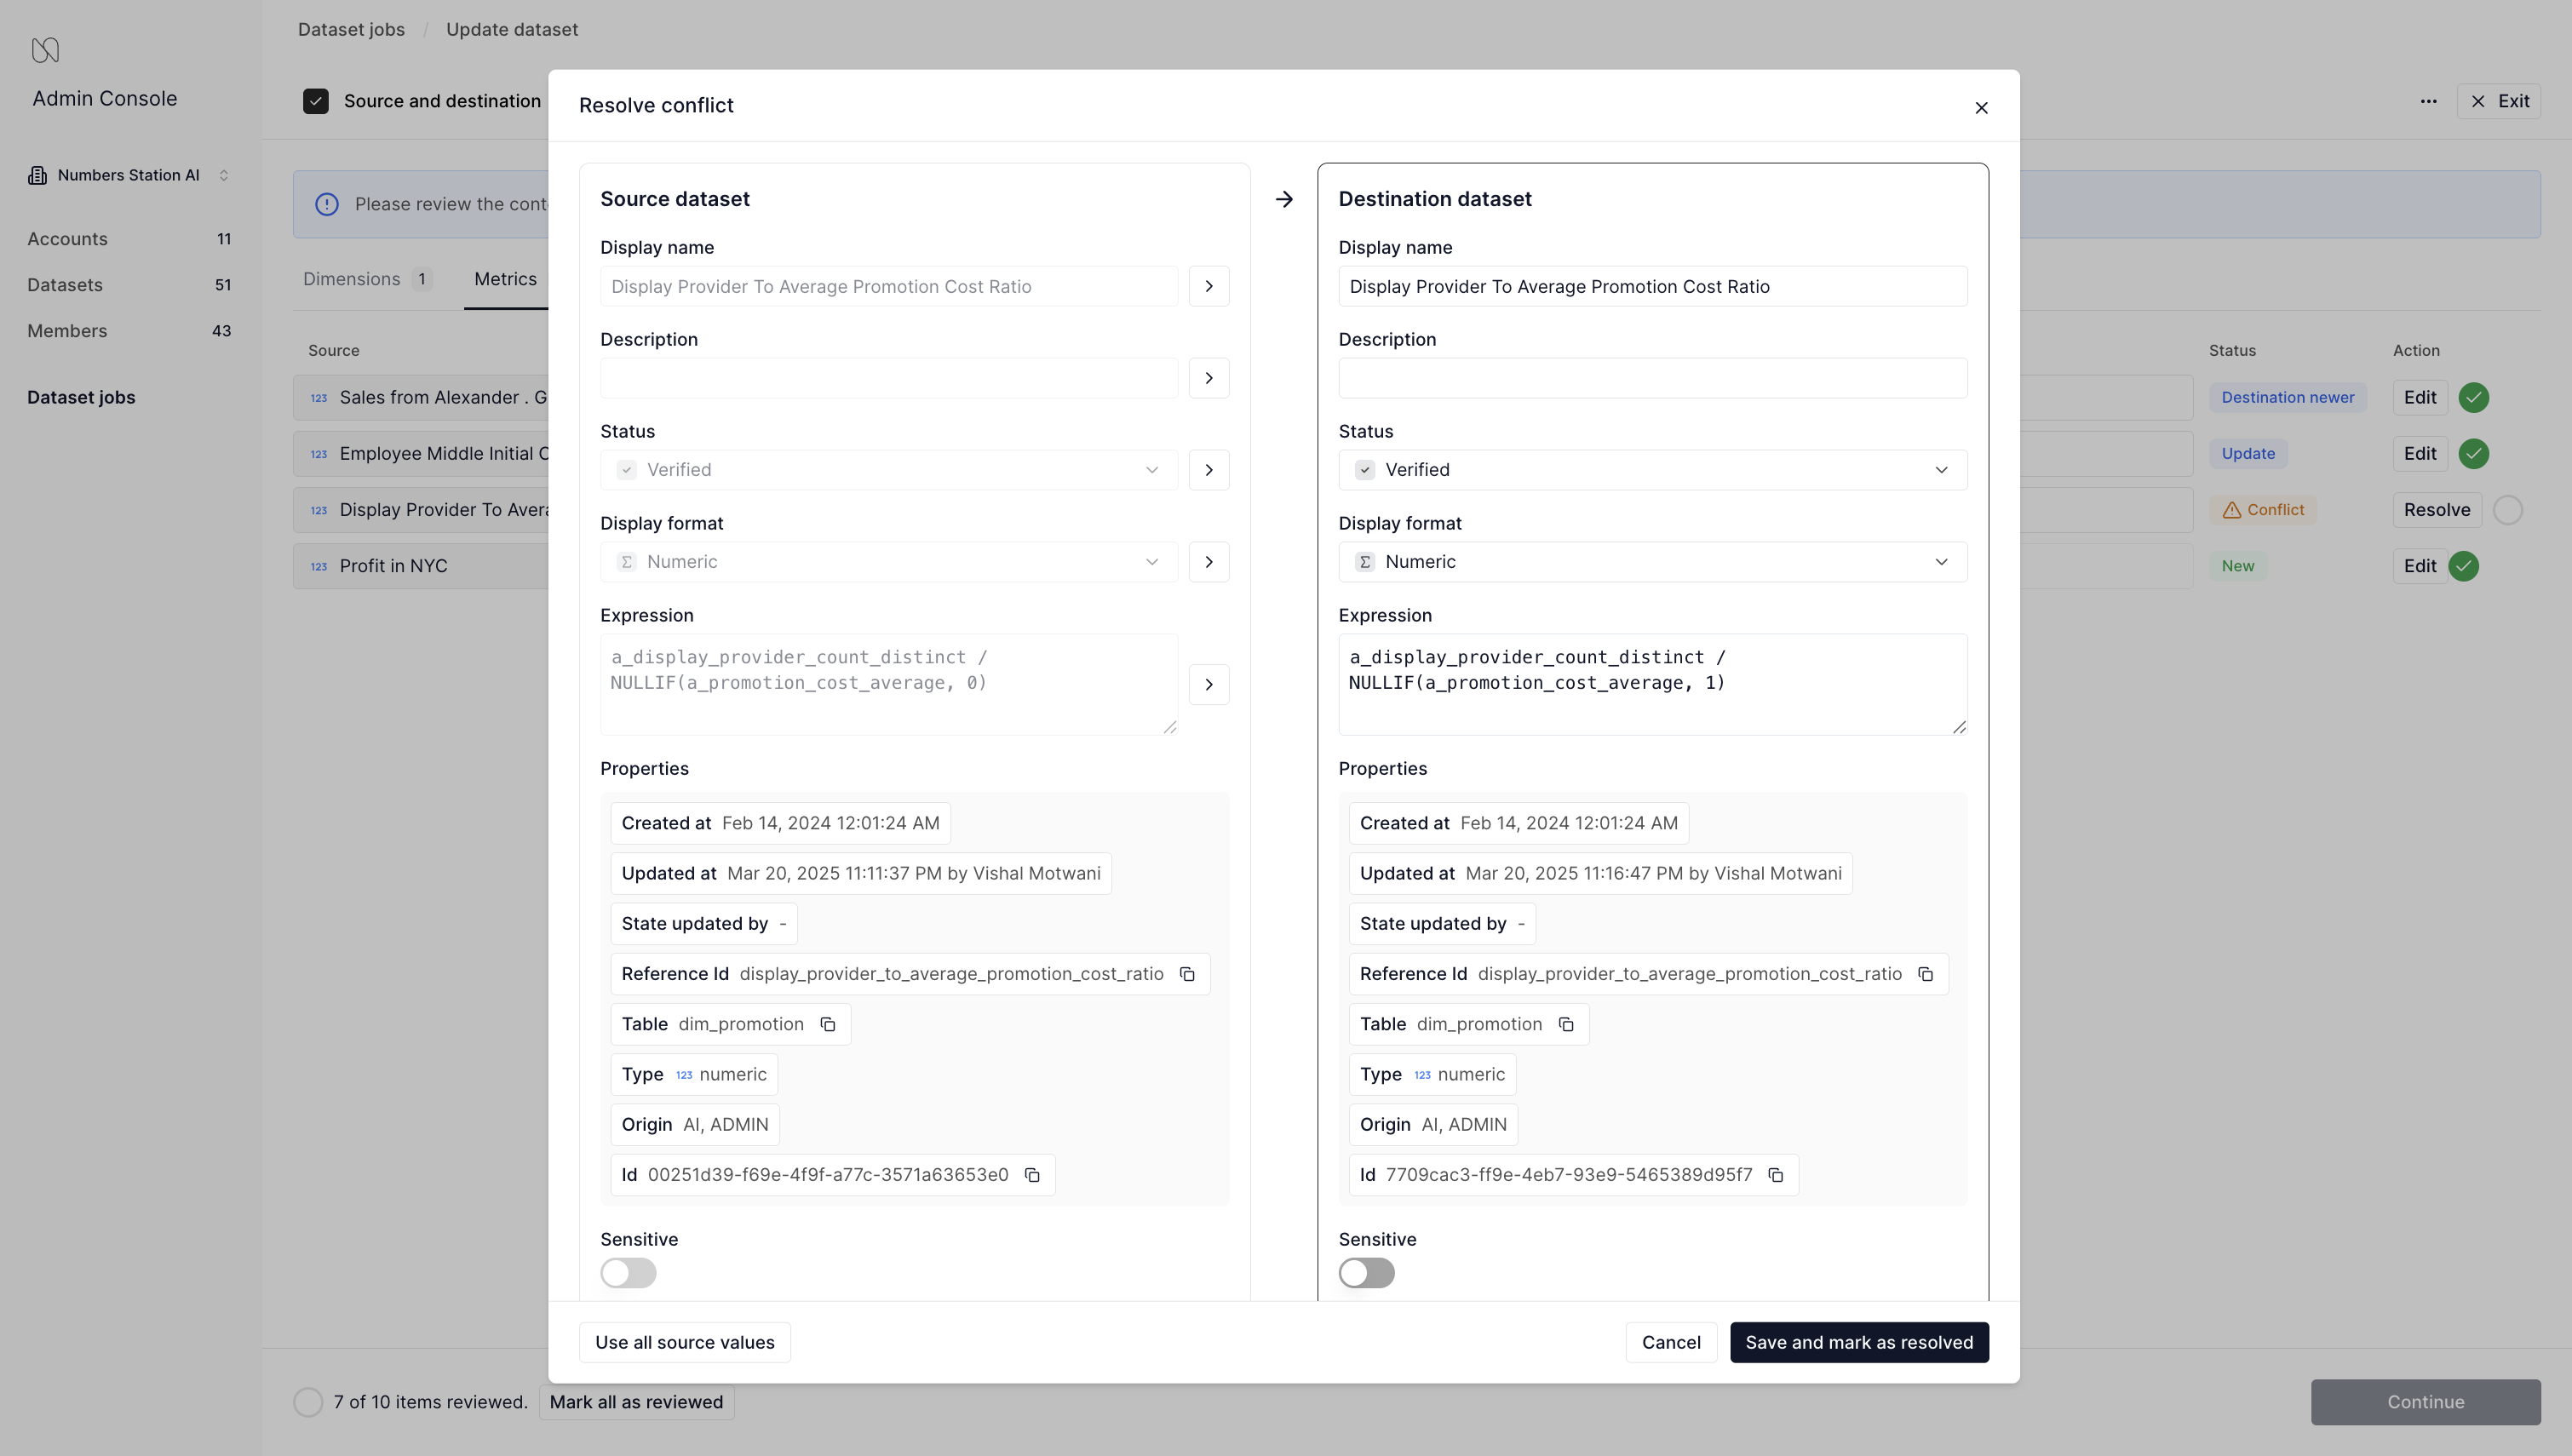
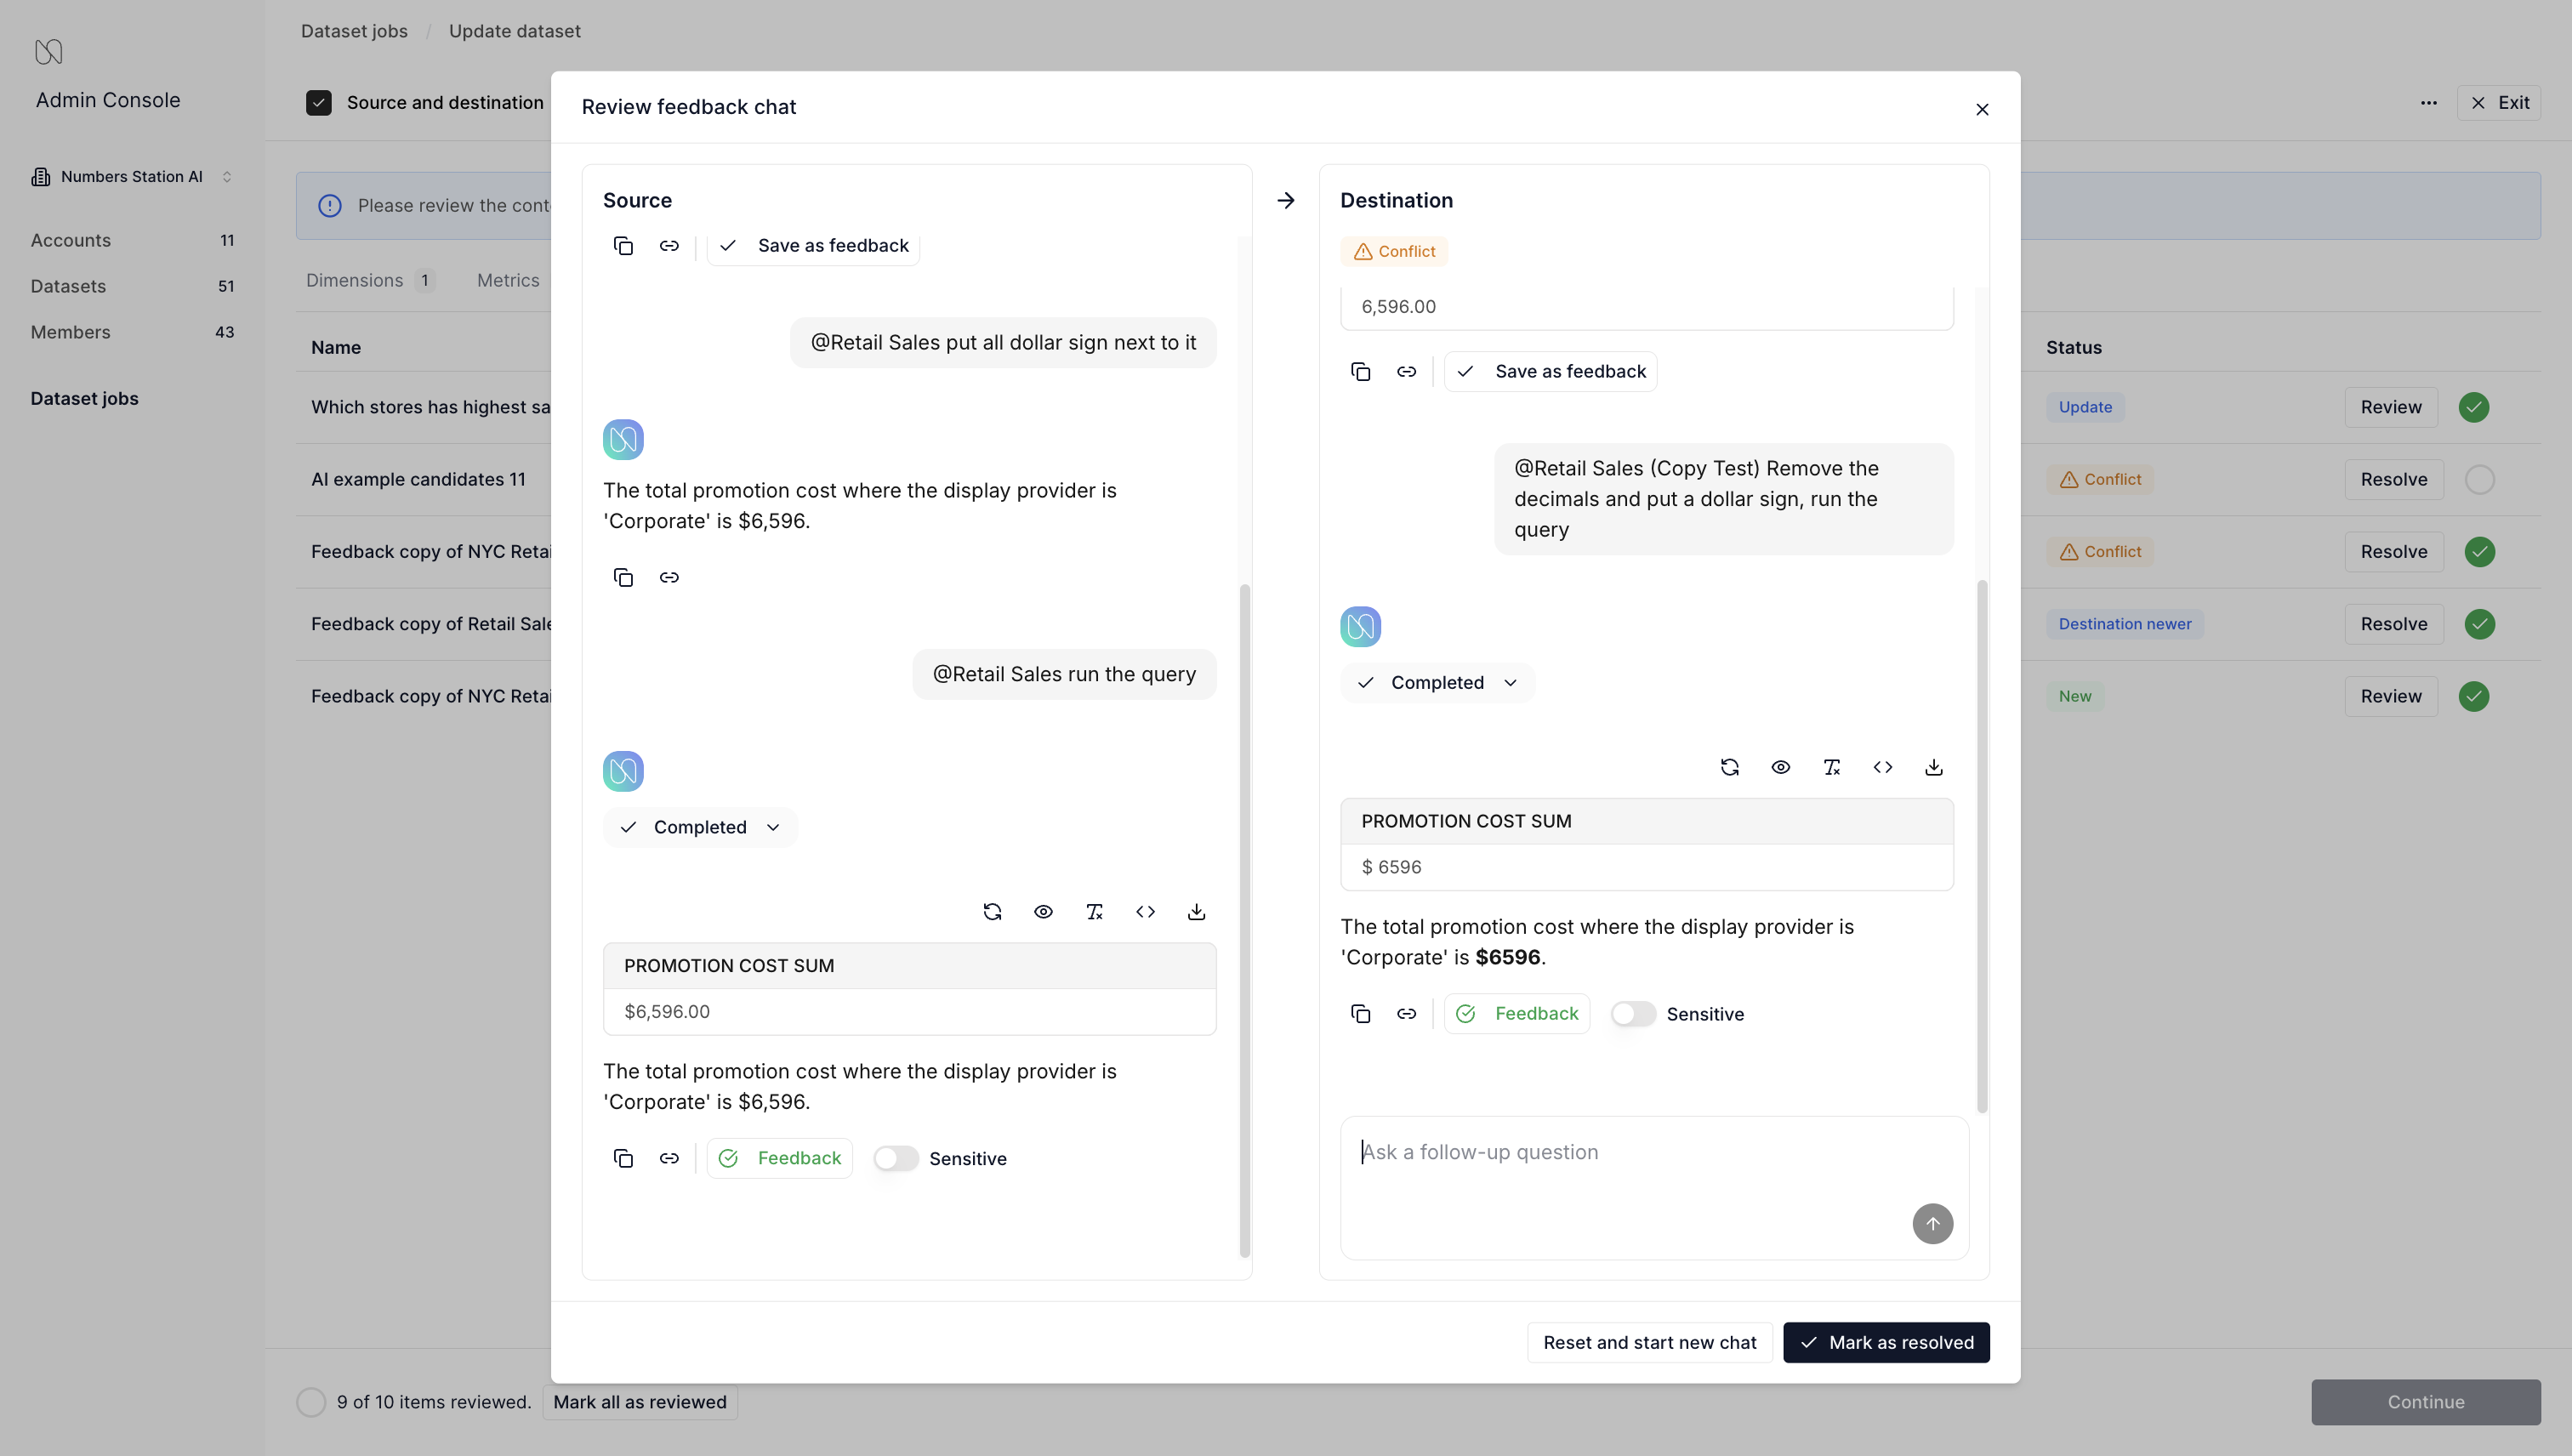
- Once all items have been reviewed and confirmed, click "Continue".
- When completed, a report is displayed that summarized the job.
